
Introduction:
A heart cake is more than just a dessert; it’s a symbol of love, celebration, and special moments shared with loved ones. Whether you’re planning a romantic Valentine’s Day dinner, a heartfelt anniversary surprise, or a festive birthday treat, a beautifully designed heart cake can add a personal and memorable touch to any occasion. The best part? You don’t need professional skills or fancy tools to create a stunning heart cake at home. With just a few basic ingredients, simple tools, and a little creativity, you can bake and decorate a heart-shaped masterpiece that will wow your friends and family. This guide will walk you through everything you need to know, from essential tools and tips to creative design ideas, making it easy to craft the perfect heart cake for your next celebration.
Tools and Ingredients You’ll Need
To create the perfect heart-shaped cake, it’s important to have the right tools and ingredients. For a detailed guide on essential baking tools and must-have ingredients, visit King Arthur Baking’s comprehensive resource. This ensures you’re fully equipped to bake and decorate your cake flawlessly!
Essential Tools
Creating a stunning heart cake starts with having the right tools in your kitchen. While you don’t need professional-grade equipment, a few key essentials can make the process smoother, ensure better results, and help bring your design ideas to life. Here’s a detailed look at the tools you’ll need:
1. Heart-Shaped Cake Pan
The star of this project is, of course, the heart-shaped cake pan. This specialized pan creates the iconic shape without the need for cutting or sculpting a regular cake.
- Size Options: Choose a pan size based on the number of servings you need. Smaller pans are perfect for intimate gatherings, while larger ones work well for bigger celebrations.
- Material: Opt for non-stick or heavy-duty metal pans for even baking and easier cake removal.
Pro Tip: If you don’t have a heart-shaped pan, you can combine a square cake and a round cake to form a heart shape by trimming and assembling them creatively.
2. Piping Bags and Tips
Decorating your heart cake is where the magic happens, and piping bags with tips are essential for adding intricate details like rosettes, borders, or lettering.
- Reusable or Disposable: Reusable piping bags are eco-friendly, while disposable ones are convenient for quick cleanup.
- Must-Have Tips: Start with basic tips like star, round, and petal tips for versatile designs. Star tips are great for rosettes, round tips for writing, and petal tips for floral accents.
3. Offset Spatula
An offset spatula is a must for spreading frosting smoothly and evenly across your cake. Its angled design allows for better control and ensures that your hands stay clear of the cake surface while you work.
- Small vs. Large: Use a small spatula for detailed work and a larger one for covering the top and sides of the cake efficiently.
Pro Tip: Warm your spatula slightly by dipping it in hot water and drying it before smoothing frosting—it helps achieve a flawless finish.
4. Cake Smoother or Bench Scraper
If you’re aiming for a polished, professional look, a cake smoother or bench scraper is essential for leveling the sides of your frosted cake. This tool is especially useful for buttercream or fondant-covered cakes.
5. Turntable (Optional)
A turntable isn’t mandatory, but it can make decorating significantly easier. It allows you to rotate the cake smoothly while frosting or piping designs, saving time and ensuring even application.
6. Basic Kitchen Tools
- Mixing Bowls and Whisks: For preparing your cake batter and frosting.
- Measuring Cups and Spoons: For precise ingredient measurements.
- Cooling Rack: To cool your cake layers evenly and prevent them from becoming soggy.
- Paring Knife: For trimming edges or leveling the cake if necessary.
By gathering these essential tools before you start, you’ll set yourself up for success. With these items on hand, even beginners can create a stunning heart cake that looks as impressive as it tastes!
Key Ingredients
The success of your heart cake depends not only on the tools you use but also on selecting the right ingredients. Using fresh, high-quality ingredients ensures your cake will be moist, flavorful, and visually appealing. Here’s a breakdown of the essential components needed for a delicious heart cake:
1. Flour
Flour serves as the foundation of your cake batter, giving it structure and texture.
- All-Purpose Flour: Ideal for a standard cake recipe, providing a balance of softness and firmness.
- Cake Flour: For an extra tender and light crumb, opt for cake flour. It has lower protein content, resulting in a delicate texture.
Pro Tip: Always sift your flour to remove lumps and ensure a smooth batter.
2. Sugar
Sugar not only sweetens the cake but also contributes to its moisture and tenderness.
- Granulated Sugar: Commonly used for the batter, offering a consistent sweetness.
- Powdered Sugar: Used for buttercream or fondant, creating smooth and creamy textures.
3. Eggs
Eggs play a vital role in binding the ingredients, adding moisture, and providing structure.
- Room Temperature Eggs: Always bring eggs to room temperature before mixing—they blend more easily and help the batter rise evenly.
4. Butter or Oil
Fats add richness, moisture, and flavor to your heart cake.
- Unsalted Butter: Preferred for its creamy flavor and ability to control salt levels in the recipe.
- Vegetable Oil: A great alternative for a moist and soft cake, especially for chocolate or spiced variations.
Pro Tip: For the best results, use softened butter, not melted, when creaming with sugar.
5. Leavening Agents
Leavening agents are crucial for helping your cake rise.
- Baking Powder: Ensures even and consistent rising.
- Baking Soda: Often used in recipes with acidic ingredients like buttermilk or cocoa powder.
Pro Tip: Double-check the freshness of your leavening agents to avoid a dense or flat cake.
6. Milk or Buttermilk
Liquids keep the cake batter smooth and provide moisture.
- Milk: A classic choice that enhances the overall texture and flavor.
- Buttermilk: Adds a tangy flavor and makes the crumb extra tender.
7. Flavorings
The flavor profile of your heart cake can vary depending on the occasion and personal preference.
- Vanilla Extract: A must-have for a classic, sweet flavor. Use pure vanilla extract for the best results.
- Cocoa Powder: Perfect for chocolate heart cakes; choose unsweetened for a rich taste.
- Food Coloring: Red or pink food coloring can enhance the romantic theme of your heart cake.
8. Frosting Ingredients
The frosting is the highlight of a beautifully decorated heart cake.
- Buttercream Frosting: Made with butter, powdered sugar, and vanilla for a creamy and versatile finish.
- Fondant: Ideal for a smooth, polished look, perfect for heart-shaped cakes.
- Whipped Cream: A lighter option for those who prefer less sweetness.
9. Decorative Add-Ons
To make your heart cake truly stunning, consider these extras:
- Sprinkles: Red, pink, or themed sprinkles add a festive touch.
- Edible Glitter: For a sparkling finish that looks magical.
- Fresh Fruits: Strawberries, raspberries, or cherries pair beautifully with a heart cake’s romantic theme.
- Sugar Flowers or Candy Hearts: Perfect for adding intricate details to your cake design.
By using these key ingredients and customizing them to your preference, you’ll create a heart cake that’s both delicious and visually striking. Whether you’re going for a classic vanilla cake or a rich chocolate creation, the right ingredients ensure your cake is a showstopper!
Optional Add-Ons
While a heart cake can be beautiful and delicious on its own, incorporating optional add-ons can take it to the next level, making it more personalized, flavorful, and visually impressive. These extra touches allow you to customize your cake based on the occasion, theme, or personal preferences. Here are some optional add-ons to consider when crafting your stunning heart cake:
1. Edible Decorations
Edible decorations add charm and elegance to your heart cake while being entirely safe to consume.
- Sugar Flowers: Intricate flowers made from sugar paste or fondant bring a romantic and elegant touch, perfect for weddings or anniversaries.
- Candy Hearts: Small, colorful candy hearts can be scattered across the cake to reinforce the theme of love.
- Chocolate Shavings or Curls: Add a touch of sophistication with dark, milk, or white chocolate accents.
- Edible Glitter: Sprinkle edible glitter over your cake for a sparkling, magical finish that’s perfect for celebrations.
Pro Tip: When using edible decorations, consider the color scheme to maintain harmony and visual appeal.
2. Flavor Enhancements
Optional flavor boosters can elevate the taste of your heart cake, making it stand out.
- Flavor Extracts: Beyond vanilla, try almond, coconut, lemon, or orange extracts for unique flavor profiles.
- Liqueurs: Brushing the cake layers with liqueurs like amaretto, rum, or Grand Marnier adds a sophisticated touch and moisture.
- Zests: Citrus zests like lemon or lime can brighten up the flavor of your frosting or batter.
- Spices: A dash of cinnamon, nutmeg, or cardamom can give your cake a warm and cozy flavor, especially for fall-themed events.
3. Filling Options
Adding a filling to your heart cake introduces exciting textures and layers of flavor.
- Fruit Compotes or Jams: Strawberry, raspberry, or cherry fillings pair beautifully with a heart-shaped cake.
- Ganache: A rich chocolate ganache layer creates a luxurious, melt-in-your-mouth experience.
- Whipped Cream and Fresh Fruits: Light and refreshing, this combination works well for summer celebrations.
- Buttercream Layers: Customize the flavor of your buttercream filling with extracts, crushed cookies, or cocoa powder.
Pro Tip: Use a piping bag to create a dam of frosting around the edges of your cake layers to keep the filling from spilling out.
4. Textures and Crunch
Introduce exciting textures to contrast the softness of the cake.
- Crushed Nuts: Almonds, pecans, or hazelnuts add crunch and richness to your cake.
- Toasted Coconut Flakes: Perfect for tropical-themed cakes, these flakes add a sweet, nutty flavor.
- Cookie Crumbles: Crushed Oreos or graham crackers can serve as a decorative topping or a layer within the cake.
- Cereal Toppings: Fruity cereal pieces can add a playful and colorful touch.
5. Themed Toppers
Toppers are a simple way to personalize your cake for the occasion.
- Custom Cake Toppers: Use a topper with the recipient’s name, a special date, or a meaningful phrase.
- Seasonal Themes: Incorporate Valentine’s Day hearts, Christmas snowflakes, or birthday candles to match the celebration.
- Photos or Edible Images: Print edible images to create a personalized and unique centerpiece for your cake.
6. Drizzle Effects
Drizzle effects create a visually stunning finish while adding more flavor.
- Chocolate Drizzle: Use dark, milk, or white chocolate to create elegant streaks down the sides of the cake.
- Caramel Sauce: A golden caramel drizzle adds both sweetness and a rich, buttery flavor.
- Berry Sauce: A vibrant red or purple berry drizzle not only enhances the flavor but also complements the heart theme.
7. Additional Layers
For a dramatic presentation, consider making your heart cake multi-layered.
- Multiple Tiers: Add height and grandeur to your cake with additional layers.
- Alternating Flavors: Use different flavors for each layer, such as chocolate and vanilla, to surprise your guests with variety.
8. Serving Enhancements
How you present and serve your heart cake can also elevate the experience.
- Plated Garnishes: Serve slices with drizzles of sauce, fresh fruit, or whipped cream on the side.
- Matching Drinks: Pair the cake with complementary beverages, such as champagne, coffee, or a themed cocktail.
By incorporating these optional add-ons, you can transform a simple heart cake into a showstopping centerpiece tailored to your event. Whether you want to add vibrant colors, unique flavors, or eye-catching decorations, these extras will make your heart cake a memorable part of any celebration.
Baking and Preparing the Cake Layers

Choosing the Right Recipe
Selecting the perfect heart cake recipe is an essential step to ensure your cake not only looks stunning but also tastes amazing. The choice of recipe will depend on factors such as your skill level, the occasion, and the flavor preferences of your audience. Here’s a guide to help you pick the right recipe for your heart cake:
1. Consider the Occasion
The event you’re celebrating will influence the type of recipe you choose.
- Romantic Events: For Valentine’s Day, anniversaries, or proposals, opt for a rich and indulgent recipe like chocolate fudge or red velvet. These flavors resonate with the theme of love and romance.
- Birthdays: For a lighthearted and fun celebration, a vanilla sponge or funfetti cake can be a great choice, especially if the cake will be decorated with vibrant colors.
- Weddings: For elegant wedding celebrations, go for more sophisticated options like almond, champagne, or a lemon lavender cake.
Pro Tip: Consider the preferences of your guests when deciding on the flavor profile for the recipe.
2. Match Your Skill Level
Your baking experience plays a role in selecting the right recipe.
- Beginner-Friendly Options: If you’re a novice, look for recipes that use simple ingredients, straightforward instructions, and minimal decorating techniques. Vanilla or butter cakes are often the easiest to master.
- Intermediate-Level Recipes: For those with some baking experience, consider recipes that involve layers, fillings, or light decoration techniques, such as a red velvet or chocolate layer cake.
- Advanced Recipes: If you’re confident in your baking skills, try recipes that involve intricate decoration, multiple layers, or unique ingredients like mousse fillings or mirror glaze finishes.
3. Choose a Base Flavor
The base flavor of your heart cake sets the tone for the overall dessert.
- Chocolate Lovers: A rich chocolate cake is perfect for those who adore deep, indulgent flavors. Add chocolate ganache or fudge frosting for extra decadence.
- Classic Vanilla: Vanilla is a versatile option that pairs well with almost any frosting or decoration. It’s also a crowd-pleaser for any occasion.
- Red Velvet: The striking red hue and subtle cocoa flavor make this a popular choice for romantic events or elegant celebrations.
- Fruity Cakes: Strawberry, lemon, or orange cakes can add a refreshing twist and a pop of color to your heart-shaped creation.
Pro Tip: Pair the cake’s flavor with complementary fillings or frostings to create a harmonious taste experience.
4. Evaluate Dietary Needs
Consider any dietary restrictions or preferences among your guests when selecting a recipe.
- Gluten-Free Options: Look for recipes that use almond flour, coconut flour, or gluten-free baking mixes to accommodate gluten-sensitive guests.
- Vegan Recipes: Vegan heart cakes can be made using plant-based ingredients such as almond milk, flaxseed, or aquafaba as egg substitutes.
- Low-Sugar Variations: For a healthier twist, choose recipes that use natural sweeteners like honey, maple syrup, or stevia instead of refined sugar.
5. Test Before the Big Day
If this is your first time making a heart cake, or if you’re experimenting with a new recipe, it’s always a good idea to do a trial run.
- Practice Techniques: Use the trial run to practice shaping the cake into a heart or using decorative tools.
- Adjust Flavors: Testing allows you to tweak flavors, sweetness, or texture to better suit your preferences.
- Time Management: A trial will also give you a realistic idea of how long the process will take from start to finish.
6. Explore Unique Recipes
If you want your heart cake to stand out, consider trying a unique or unconventional recipe.
- Marbled Cake: A combination of chocolate and vanilla batter creates a beautiful swirled effect inside the cake.
- Ombre Layers: Gradually tinted layers of cake in shades of pink, red, or any theme color create a visually stunning effect.
- Tiramisu Heart Cake: For coffee lovers, a tiramisu-inspired heart cake can offer a rich and flavorful alternative.
- Floral-Infused Cakes: Recipes that incorporate rose water, lavender, or hibiscus can add a fragrant and unexpected twist.
7. Recipe Reviews and Recommendations
Before settling on a recipe, check reviews and recommendations from other bakers.
- Popular Blogs: Many recipe blogs provide detailed reviews, tips, and visual guides to help you choose and execute a recipe successfully.
- Community Recommendations: Baking forums or social media groups are great places to get suggestions for tried-and-true recipes.
- Family Favorites: If you have a trusted family recipe, consider adapting it for your heart cake—it adds a personal and nostalgic touch.
By carefully choosing the right recipe, you set the foundation for a stunning and delicious heart cake. Whether you’re looking for simplicity, elegance, or bold flavors, the perfect recipe will ensure your cake becomes the centerpiece of any celebration.
Properly Preparing Your Heart-Shaped Pan
The foundation of a perfectly baked heart cake lies in the preparation of your heart-shaped pan. Properly preparing your pan ensures your cake comes out flawlessly, with no sticking, tearing, or uneven surfaces. Follow these steps to guarantee a smooth baking experience and beautiful results:
1. Choosing the Right Pan
Before you even begin preparing your pan, it’s crucial to select the right one.
- Material Matters: Opt for a non-stick pan made of high-quality aluminum or stainless steel. These materials distribute heat evenly, ensuring your cake bakes uniformly.
- Size Considerations: Choose a pan size that suits your recipe. If your pan is too large, the cake may bake unevenly or appear too thin. Too small, and the batter may overflow.
- Depth: A deeper pan works best for layered cakes, while a shallower one is perfect for single-layer cakes.
Pro Tip: If you don’t have a heart-shaped pan, create your own by using a round and square pan together. Cut and arrange the pieces into a heart shape before frosting.
2. Grease the Pan Thoroughly
Proper greasing is key to prevent your cake from sticking to the pan.
- Butter or Oil: Use softened butter or vegetable oil to coat the entire surface of the pan, including the sides and corners of the heart shape.
- Pastry Brush: A pastry brush can help evenly distribute the grease, especially in tight corners and curves.
- Non-Stick Spray: For convenience, use a non-stick baking spray designed specifically for cakes.
Pro Tip: Avoid using melted butter, as it may pool in certain areas, leading to uneven greasing.
3. Add a Layer of Parchment Paper
For extra insurance, line your pan with parchment paper.
- Cut to Fit: Place the pan on a sheet of parchment paper and trace its outline. Cut out the shape and place it at the bottom of the pan.
- Secure the Paper: Lightly grease the pan before placing the parchment to help it stick. Once the paper is in place, grease over it as well.
Why This Works: Parchment paper makes it easier to remove the cake without breaking its shape.
4. Lightly Flour the Pan
Adding flour creates a barrier between the batter and the pan.
- How to Flour: After greasing, sprinkle a tablespoon of flour into the pan. Tilt and rotate the pan to distribute the flour evenly over the greased surface.
- Tap Out Excess: Turn the pan upside down and gently tap to remove any excess flour.
Pro Tip: For chocolate cakes, use cocoa powder instead of flour to maintain the cake’s rich color.
5. Check for Evenness
Uneven surfaces in the pan can cause your cake to bake unevenly.
- Inspect the Pan: Check for any dents, warps, or irregularities in the pan’s surface.
- Level It: Place the pan on a flat surface to ensure it sits evenly. An uneven pan may result in batter pooling in one area during baking.
Pro Tip: If your pan is uneven, use a baking sheet underneath to stabilize it in the oven.
6. Use Baking Strips for Even Baking
Baking strips, which wrap around the outside of your pan, help regulate heat distribution.
- Why Use Them: They prevent the edges of the cake from baking too quickly, ensuring an even rise and avoiding a domed center.
- DIY Option: If you don’t have baking strips, dampen a kitchen towel, fold it into a strip, and wrap it around the pan. Secure it with safety pins.
7. Preheat the Oven and Prepare the Pan Early
Timing is essential for successful baking.
- Preheat Your Oven: Ensure the oven is at the correct temperature before placing the cake inside. A properly preheated oven ensures consistent baking.
- Prepare Ahead: Grease, line, and flour your pan before mixing the batter. This prevents delays and allows you to transfer the batter to the oven immediately after mixing, preserving the leavening agents’ effectiveness.
8. Test with Water (Optional)
If you’re uncertain about your pan’s integrity, perform a quick water test.
- What to Do: Fill the pan with a small amount of water and check for leaks, especially around the edges of intricate shapes like a heart.
- Why It Helps: This ensures no batter will seep out during baking.
By properly preparing your heart-shaped pan, you set the stage for a smooth baking process and a cake that slides out effortlessly, maintaining its beautiful shape. Taking the time to follow these steps will save you from common baking mishaps and guarantee a heart cake that looks as stunning as it tastes.
Baking Tips for Even Layers
Creating even layers is crucial for a visually stunning and well-balanced heart cake. Uneven layers can lead to instability, uneven frosting, and a less polished final presentation. These baking tips will ensure your heart cake layers are perfectly level and ready for assembly.
1. Measure and Divide Your Batter Accurately
The first step to achieving even layers starts before the batter reaches the oven.
- Use a Kitchen Scale: Weigh the batter and divide it equally between pans to ensure consistency.
- Visual Check: If you don’t have a scale, use a measuring cup or spoon to divide the batter by volume.
- Mark the Fill Line: Ensure each pan is filled to the same height. Mark the inside of the pan with a ruler or tape for reference.
Why This Matters: Even batter distribution prevents one layer from being thinner or thicker than the other.
2. Rotate the Pans Midway Through Baking
Uneven oven heating can cause one side of your cake to bake faster than the other.
- Rotate for Consistency: About halfway through the baking time, carefully rotate the pans 180 degrees to promote even baking.
- Avoid Disturbing the Rise: Don’t open the oven too early, as it can cause the cake to sink. Wait until the batter is partially set before rotating.
Pro Tip: Test your oven’s hot spots by baking a tray of bread slices to see which areas brown faster.
3. Use Baking Strips for Even Heat Distribution
Baking strips are game-changers for achieving flat, even layers.
- What They Do: These fabric strips wrap around your cake pans, cooling the outer edges and preventing them from baking faster than the center.
- DIY Option: Soak a kitchen towel in water, wring it out, and wrap it around the pan, securing it with safety pins.
Why It Works: Baking strips reduce doming, making it easier to stack and frost your cake layers.
4. Avoid Overmixing the Batter
Overmixing introduces too much air into the batter, causing uneven rising and dense spots.
- Mix Until Combined: Once the dry and wet ingredients are incorporated, stop mixing.
- Use the Right Tool: Opt for a hand whisk or spatula instead of an electric mixer for delicate batters.
Pro Tip: Sift the dry ingredients beforehand to ensure even mixing with minimal effort.
5. Check for Level Pans
An uneven pan can result in lopsided layers.
- Test for Flatness: Place the pan on a flat surface and check for gaps between the pan and the surface.
- Use a Baking Sheet: Place the pan on a larger baking sheet to stabilize it in the oven.
Why It’s Important: A level pan ensures even baking and prevents batter from pooling to one side.
6. Remove Domes with a Cake Leveler
Even with proper preparation, cakes can still develop slight domes.
- Cool Completely: Allow the cake to cool fully before trimming to avoid crumbling.
- Level Each Layer: Use a cake leveler or a serrated knife to slice off the domed top. For precision, rotate the cake slowly as you cut.
Pro Tip: Save the trimmed pieces for making cake pops or as a snack!
7. Bake Layers Individually
If possible, bake your layers one at a time instead of using a single deep pan.
- Why It Helps: Baking individual layers reduces the risk of uneven rising and ensures each layer bakes at the same rate.
- Shorten Baking Time: Smaller layers bake faster, so keep an eye on them to prevent overbaking.
Pro Tip: If you only have one pan, bake in batches and wash, dry, and re-grease the pan between uses.
8. Tap the Pan to Remove Air Bubbles
Trapped air bubbles can cause uneven textures and rising.
- Tap Before Baking: Gently tap the pan on the counter a few times to release any air bubbles in the batter.
- Smooth the Batter: Use a spatula to spread the batter evenly before placing it in the oven.
Why It Matters: A smooth surface helps the cake bake evenly, resulting in uniform layers.
9. Use an Oven Thermometer
Even baking starts with a properly calibrated oven.
- Test Your Oven: Place an oven thermometer inside to ensure the temperature matches the setting.
- Adjust If Needed: If your oven runs hot or cold, adjust the temperature accordingly to achieve the perfect bake.
Pro Tip: Preheat your oven fully and wait a few minutes after the timer goes off to ensure even heat.
10. Cool Layers Upside Down
To encourage flat tops, cool your cake layers upside down.
- Use a Cooling Rack: Flip the layers onto a cooling rack while still warm.
- Apply Light Pressure: If needed, place a clean, flat plate or cutting board on top to gently press the cake flat as it cools.
Why It Works: Gravity helps flatten domes, resulting in even layers without the need for excessive trimming.
With these baking tips, you’ll achieve perfectly even layers that make assembling your heart cake a breeze. Even layers not only enhance the cake’s visual appeal but also contribute to balanced flavors in every bite.
Decorating Your Heart Cake
Frosting Techniques for Beginners
Mastering the art of frosting a cake can seem intimidating, but with a few beginner-friendly techniques, you can achieve a beautifully decorated heart cake. Frosting plays a crucial role in the cake’s appearance, taste, and texture, making it an essential skill to hone. Follow these simple techniques to frost your cake with confidence and flair.
1. Start with a Crumb Coat
A crumb coat is a thin layer of frosting that traps loose crumbs and creates a smooth base for your final layer of frosting.
- Why It’s Important: This step prevents crumbs from mixing with the outer layer, resulting in a clean, polished finish.
- How to Apply: Spread a thin layer of frosting over the entire cake using an offset spatula. Don’t worry about perfection—this layer will be covered.
- Chill It: Place the cake in the refrigerator for 15–30 minutes to set the crumb coat before proceeding.
Pro Tip: Use a neutral-colored frosting like white or light pink for the crumb coat, especially when working with vibrant final layers.
2. Use an Offset Spatula for Even Application
An offset spatula is an essential tool for beginners because it provides better control and precision.
- Spread the Frosting: Place a generous dollop of frosting on the top of the cake and spread it outward in a smooth, circular motion.
- Cover the Sides: After the top is frosted, apply frosting to the sides of the cake, working in sections for even coverage.
- Smooth It Out: Hold the spatula at a slight angle and use long, smooth strokes to create a seamless look.
Pro Tip: Keep a glass of warm water nearby to dip the spatula in between strokes for a smoother finish.
3. Use a Cake Turntable
A cake turntable is a game-changer for achieving an even and professional look.
- Why It Helps: Rotating the cake while frosting allows you to maintain consistent pressure and smoothness.
- How to Use It: Place the cake on the turntable, and use one hand to spin it slowly while the other applies frosting.
- Achieve Clean Edges: For sharp edges on the top, gently spin the turntable while holding the spatula steady at a slight angle.
Pro Tip: If you don’t have a turntable, place the cake on an inverted plate or a lazy Susan for a similar effect.
4. Master the Art of Smoothing
A smooth finish is the hallmark of a beautifully frosted cake.
- Bench Scraper Technique: Hold a bench scraper vertically against the side of the cake and slowly rotate the turntable to smooth the frosting.
- Fix Imperfections: Fill any gaps or uneven spots with additional frosting and smooth again.
- Top Finish: Use the edge of the scraper or spatula to gently flatten the top, pulling excess frosting towards the edges.
Pro Tip: If you prefer a textured finish, use the back of a spoon or a spatula to create swirls or patterns in the frosting.
5. Add Decorative Piping
Piping can add a touch of elegance and personality to your heart cake.
- Choose Your Tip: Use a star tip for rosettes, a round tip for dots, or a petal tip for ruffles.
- Practice First: Pipe a few designs on parchment paper to get comfortable before applying them to the cake.
- Outline the Heart: Pipe a decorative border around the edges of the heart cake to enhance its shape.
Pro Tip: Use contrasting frosting colors for piping to make the designs pop.
6. Experiment with Simple Decorations
If you’re not ready for intricate designs, start with simple decorations that are easy to execute.
- Sprinkles: Add a handful of sprinkles to the top or sides for a playful look.
- Drips: Drizzle ganache or a colored glaze along the edges for a trendy drip effect.
- Edible Flowers: Garnish with fresh or edible flowers for a romantic touch.
Pro Tip: Match the decorations to the theme of your cake, such as red sprinkles or heart-shaped candies for Valentine’s Day.
7. Keep Your Tools Clean
A clean spatula and piping bag make all the difference in achieving a professional look.
- Wipe Often: Keep a damp cloth or paper towel nearby to wipe off excess frosting from your tools.
- Avoid Mixing Colors: If using multiple frosting colors, clean your tools thoroughly before switching colors.
Pro Tip: Chill the frosting slightly if it becomes too soft to work with.
8. Finish with a Polished Look
The final touches can elevate your heart cake from homemade to bakery-worthy.
- Add a Glossy Finish: Lightly brush the frosting with a damp pastry brush for a soft sheen.
- Neaten the Edges: Use a small knife or spatula to clean up any frosting smudges on the cake board or plate.
Pro Tip: Step back and assess the cake from all angles before declaring it complete.
With these beginner-friendly frosting techniques, you’ll be able to create a heart cake that looks as good as it tastes. Practice makes perfect, so don’t be afraid to experiment and find your own frosting style!
Adding Romantic Details
Decorating a heart cake with romantic details can transform a simple dessert into a stunning centerpiece for a special occasion. Whether it’s for Valentine’s Day, an anniversary, or a romantic dinner, adding thoughtful touches can create a truly memorable cake. Below are some creative ideas and techniques to make your heart cake stand out.
1. Use Color Themes for Romance
The color palette of your cake plays a vital role in setting the romantic tone.
- Classic Colors: Red and pink are timeless choices that evoke love and passion. Use these colors for frosting, decorations, or even the cake layers themselves.
- Subtle Pastels: Soft pastel shades like lavender, peach, or blush pink can create an elegant and dreamy look.
- Metallic Touches: Incorporate gold or silver accents using edible luster dust or metallic sprinkles to add a luxurious feel.
Pro Tip: For a dramatic effect, use ombre frosting, blending light and dark shades of the same color.
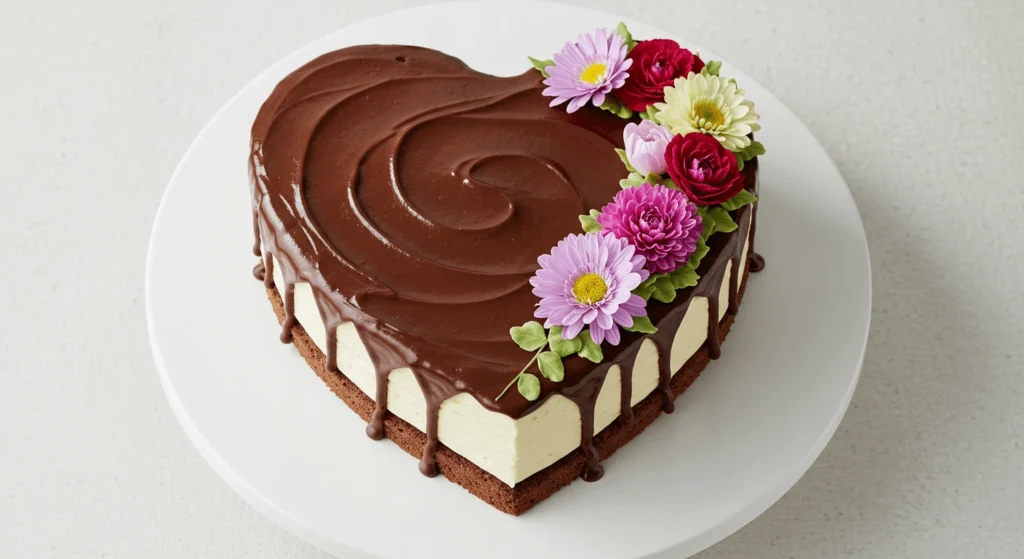
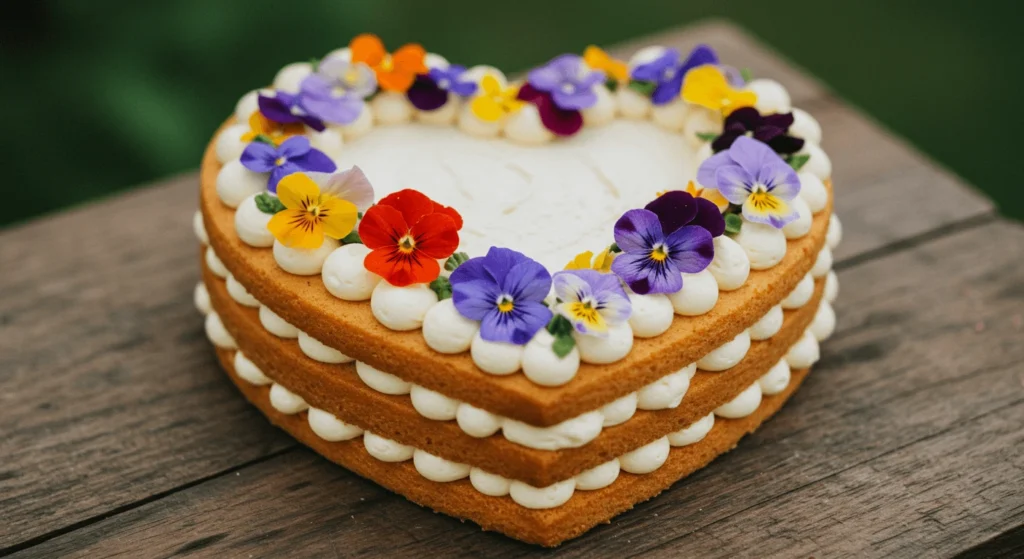
2. Add Edible Flowers
Edible flowers are a beautiful and sophisticated way to enhance your cake’s romantic vibe.
- Popular Choices: Roses, violets, pansies, and marigolds are edible and safe to use.
- Placement: Arrange flowers along the edges of the cake, form a heart-shaped wreath on top, or create a cascading effect down the sides.
- Preparation: Wash the flowers thoroughly and ensure they are pesticide-free before adding them to your cake.
Pro Tip: Use a mix of fresh and crystallized flowers for added texture and visual interest.
3. Incorporate Heart-Themed Decorations
Hearts are the ultimate symbol of romance, so incorporating them into your cake design is a must.
- Fondant Hearts: Cut out heart shapes from fondant and arrange them on the cake in patterns or layers.
- Chocolate Hearts: Mold hearts from melted chocolate and place them as toppers or along the sides of the cake.
- Piping Hearts: Use a piping bag with a round or star tip to pipe hearts onto the cake’s surface or borders.
Pro Tip: Experiment with different sizes and colors of hearts for a playful yet romantic effect.
4. Personalize with Messages
Adding a personalized message makes the cake even more meaningful.
- Write in Frosting: Use a piping bag with a small round tip to write messages like “I Love You,” “Be Mine,” or the names of the couple.
- Edible Letters: Purchase edible letter decorations or make your own from fondant or chocolate.
- Topper Text: Create or buy a cake topper with a romantic phrase or monogram.
Pro Tip: Use contrasting frosting colors for the text to ensure it stands out.
5. Use Sparkling Edible Accents
Glitter and sparkle can add a magical touch to your heart cake.
- Edible Glitter: Lightly dust edible glitter over the frosting for a subtle shimmer.
- Sugar Crystals: Sprinkle colored sugar crystals along the edges or across the surface of the cake.
- Pearl Sprinkles: Add edible pearls for a classy and romantic finish.
Pro Tip: Use edible decorations sparingly to avoid overwhelming the design.
6. Add a Drip Design
A drip design not only looks elegant but also adds depth to your cake.
- Chocolate Ganache Drips: Melt chocolate and pour it along the edges, allowing it to drip naturally down the sides.
- Colored Drips: Use tinted white chocolate or candy melts for a vibrant or pastel drip effect.
- Flavored Drips: Consider using caramel or fruit-based sauces for added flavor.
Pro Tip: Chill the cake before adding the drip to ensure the frosting is firm and the drips set properly.
7. Incorporate Romantic Shapes Beyond Hearts
While hearts are the focus, you can add other romantic shapes for variety.
- Roses and Flowers: Pipe buttercream or fondant roses to accentuate the romantic theme.
- Swirls and Ruffles: Create elegant swirls, ruffles, or lace patterns with frosting to add texture and charm.
- Cupid Arrows: Add fondant or chocolate arrows crossing through the heart for a whimsical touch.
Pro Tip: Coordinate these shapes with the overall theme and occasion to tie the design together.
8. Add a Cake Topper
A cake topper can serve as the crowning detail for your heart cake.
- Romantic Phrases: Opt for toppers with phrases like “Love,” “Forever,” or “You & Me.”
- Custom Toppers: Create or purchase personalized toppers featuring the couple’s names or initials.
- Figurines: Use figurines of couples, hearts, or doves for a traditional yet romantic look.
Pro Tip: Position the topper slightly off-center for a modern and dynamic design.
9. Surround with Romantic Touches
The presentation of your cake can also add to its romantic appeal.
- Cake Stand: Use a decorative cake stand in complementary colors or materials like gold, glass, or wood.
- Candles: Surround the cake with candles to create a warm and intimate ambiance.
- Fresh Flowers: Place additional fresh flowers or petals around the base of the cake for a cohesive look.
Pro Tip: Use soft, dim lighting to enhance the romantic atmosphere when serving the cake.
By incorporating these romantic details, your heart cake will not only taste delicious but also serve as a stunning expression of love and creativity. Let your imagination guide you, and don’t be afraid to experiment with different techniques and decorations to make your cake truly unique.
Using Fondant for a Polished Look
Fondant is a versatile and professional-looking cake covering that can elevate the appearance of your heart cake. Whether you’re aiming for a smooth and sleek finish or intricate designs, fondant can help you achieve a polished look that’s sure to impress. Below, we’ll explore how to work with fondant effectively and incorporate it into your heart cake design.
1. Why Choose Fondant?
Fondant is a go-to choice for bakers when creating a refined and elegant cake.
- Smooth Finish: Unlike buttercream, fondant provides a flawless, matte surface ideal for clean designs.
- Versatility: It can be rolled, shaped, and sculpted into various decorations, making it perfect for heart-themed embellishments.
- Durability: Fondant holds up well in warmer conditions, ensuring your cake looks great for longer.
- Customizable: Fondant can be easily tinted with gel food coloring to match any color scheme.
Pro Tip: Use pre-made fondant for convenience, or make your own marshmallow fondant for a softer, homemade option.
2. Preparing Your Cake for Fondant
Proper preparation is key to achieving a smooth fondant finish.
- Level the Cake: Trim the tops of your cake layers to ensure an even surface. Use a serrated knife or cake leveler for precision.
- Crumb Coat: Apply a thin layer of buttercream or ganache as a base. This will help the fondant adhere and create a smooth foundation.
- Chill the Cake: Place the crumb-coated cake in the fridge for 30 minutes to firm up the surface before applying fondant.
Pro Tip: Avoid over-chilling the cake, as condensation can form and make the fondant sticky.
3. Rolling Out Fondant
Rolling fondant evenly is crucial for a polished appearance.
- Surface Preparation: Dust your work surface with powdered sugar or cornstarch to prevent sticking.
- Rolling Pin: Use a non-stick rolling pin to roll the fondant to about 1/8-inch thickness. Ensure it’s large enough to cover the entire cake, including the sides.
- Smooth Edges: Rotate the fondant as you roll to maintain a circular shape and prevent cracks at the edges.
Pro Tip: Use a fondant mat with measurements to help roll out the perfect size.
4. Covering the Cake
Applying fondant requires care to avoid tears or bubbles.
- Drape the Fondant: Gently lift the rolled fondant using a rolling pin and drape it over the cake. Start from the center and work outward.
- Smooth the Surface: Use a fondant smoother to press the fondant onto the cake, eliminating air bubbles and creases.
- Trim Excess: Cut away excess fondant at the base using a sharp knife or pizza cutter.
Pro Tip: Work quickly but carefully, as fondant can dry out if left exposed to air for too long.
5. Decorating with Fondant
Fondant isn’t just for covering the cake—it’s also great for creating decorations.
- Heart Shapes: Use heart-shaped cutters to make fondant accents that can be placed on the cake’s surface or edges.
- Ruffles and Roses: Create romantic fondant ruffles or roses for an elegant, textured look.
- Embossed Patterns: Use embossing mats or tools to add intricate designs, such as lace or floral motifs, to the fondant.
- Layered Effects: Add dimension by layering fondant pieces, like overlapping hearts or cascading flowers.
Pro Tip: Attach decorations with a small brush and water or edible glue for a seamless finish.
6. Coloring and Texturing Fondant
Fondant can be easily customized to suit your theme and style.
- Tinting: Use gel food coloring to achieve vibrant colors. Knead the fondant until the color is evenly distributed.
- Marbling: Combine two or more colors of fondant, gently twisting and rolling them together to create a marbled effect.
- Shimmer and Shine: Dust the fondant with edible luster dust or pearl powder for a glamorous touch.
- Textures: Create textures using tools like veiners, impression mats, or even household items like forks or toothpicks.
Pro Tip: For a romantic heart cake, consider blending red, pink, and white fondant for a gradient effect.
7. Troubleshooting Common Fondant Issues
Even experienced bakers encounter challenges with fondant. Here’s how to fix common problems:
- Cracks or Tears: Patch small cracks by rubbing them gently with a little shortening or water.
- Air Bubbles: Pop air bubbles with a pin or toothpick, then smooth the area with your fingers or a fondant smoother.
- Sticky Fondant: If fondant becomes sticky, dust your hands and tools with cornstarch or powdered sugar.
Pro Tip: Practice on a small cake or dummy cake to build confidence with fondant techniques.
8. Serving and Storing a Fondant-Covered Cake
Fondant requires specific handling to maintain its polished look.
- Serving: Use a clean, sharp knife to cut the fondant smoothly without tearing it.
- Storing: Keep the cake in a cool, dry place. Avoid refrigeration, as moisture can cause the fondant to sweat.
Pro Tip: If the cake must be refrigerated, place it in a cake box to minimize condensation.
By mastering fondant techniques, you can transform your heart cake into a professional-looking masterpiece. Whether you keep it simple or go all out with decorative details, fondant offers endless possibilities to bring your vision to life.
Creative Design Ideas for Every Occasion
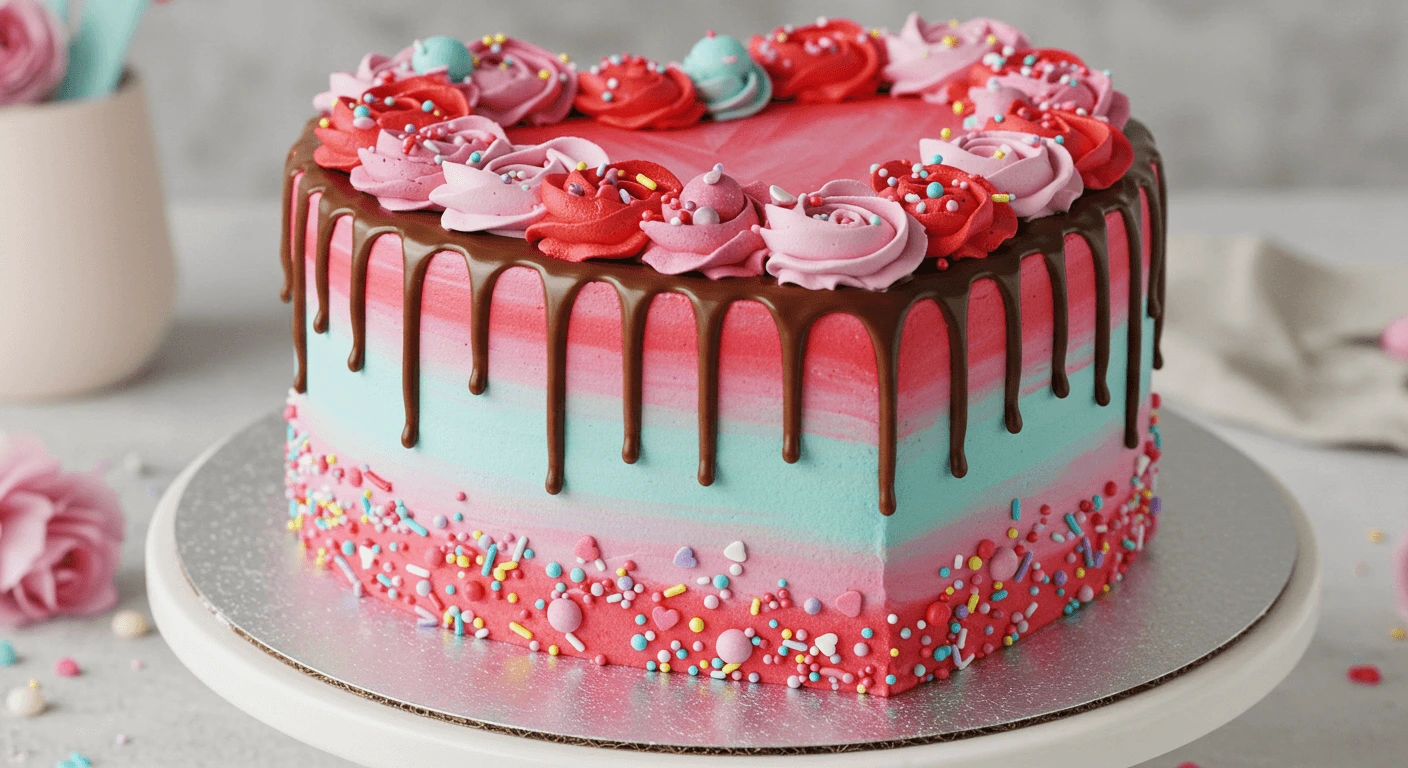
Valentine’s Day Heart Cake
A Valentine’s Day heart cake is the ultimate expression of love, combining sweetness and creativity to celebrate a special occasion. Whether you’re baking for a romantic partner, family, or friends, a heart-shaped cake is a thoughtful and visually stunning way to show you care. In this section, we’ll explore why a heart cake is perfect for Valentine’s Day, how to make it unique, and tips for adding personal touches.
1. Why a Heart Cake Is Perfect for Valentine’s Day
A heart-shaped cake symbolizes love, making it the ideal dessert for Valentine’s Day.
- Romantic Gesture: The heart shape naturally conveys affection and devotion, making it a heartfelt gift.
- Customizable Design: You can personalize the cake with colors, flavors, and decorations that resonate with your loved one.
- Festive Centerpiece: A beautifully decorated heart cake serves as both a dessert and a centerpiece for your Valentine’s Day table.
- Inclusive Celebration: Heart cakes aren’t just for romantic partners; they can also be made to celebrate friendships and family love.
Pro Tip: Pair the heart cake with a handwritten card or a bouquet of flowers to create a memorable Valentine’s experience.
2. Flavor Ideas for Valentine’s Day
Choosing the right flavor profile can make your heart cake even more special. Consider these options:
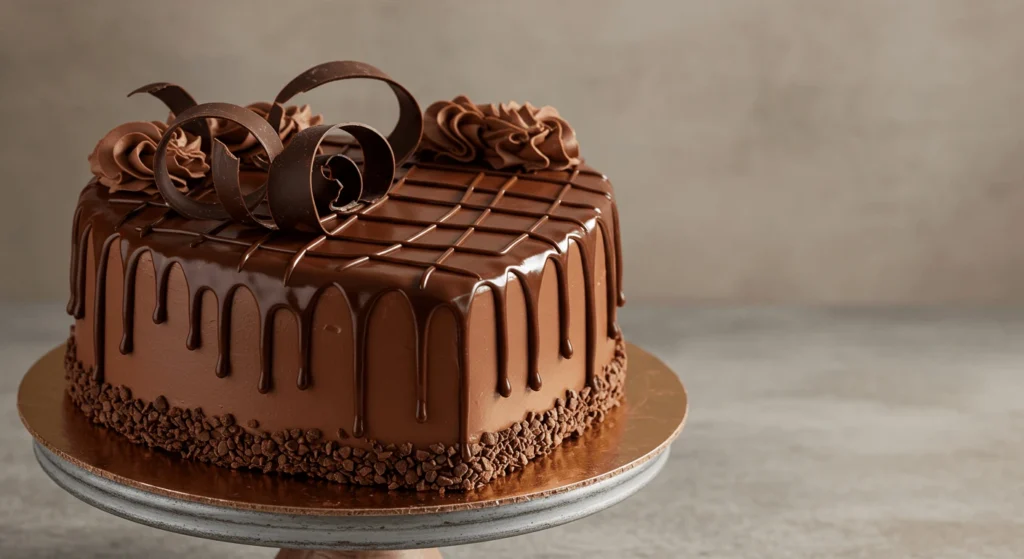
- Classic Red Velvet: A deep red cake with cream cheese frosting adds an elegant and romantic touch.
- Decadent Chocolate: Rich, moist chocolate cake is always a crowd-pleaser, especially when paired with a glossy ganache.
- Sweet Strawberry: A light and fruity strawberry cake with fresh berries and whipped cream is perfect for the season.
- Vanilla Bean with Raspberry Filling: A delicate vanilla cake filled with tangy raspberry preserves creates a delightful contrast.
- Funfetti Celebration: For a playful twist, add colorful sprinkles to the batter for a cake that’s as fun as it is delicious.
Pro Tip: Use natural food coloring to achieve pastel or bold shades that match Valentine’s Day hues.
3. Decorating Ideas for a Valentine’s Day Theme
A Valentine’s heart cake is all about the decorations, so let your creativity shine.
- Fondant Accents: Use red, pink, or white fondant to create hearts, ribbons, or roses. Layer these decorations for a three-dimensional effect.
- Buttercream Flowers: Pipe buttercream flowers like roses, tulips, or daisies around the edges or on top of the cake.
- Edible Glitter: Add a touch of sparkle with edible glitter or luster dust to create a magical finish.
- Chocolate Drizzle: Drizzle melted white or dark chocolate over the cake for a dramatic and elegant effect.
- Personalized Messages: Write “Happy Valentine’s Day” or a heartfelt message using edible markers, chocolate, or piped icing.
Pro Tip: Use a rotating cake stand for precision while decorating, ensuring a polished and professional look.
4. Adding a Romantic Twist
To make your Valentine’s Day heart cake extra romantic, consider these enhancements:
- Hidden Surprise: Hollow out the center of the cake and fill it with heart-shaped candies, sprinkles, or chocolate truffles for a delightful surprise.
- Color Gradient: Create an ombre effect on the frosting by blending shades of pink and red for a soft, romantic appearance.
- Fresh Flowers: Decorate the cake with edible or non-toxic fresh flowers like roses or carnations for a natural and elegant touch.
- Candy Borders: Use conversation hearts, chocolate kisses, or candy pearls to line the edges of the cake for a playful and sweet decoration.
Pro Tip: For a show-stopping effect, top the cake with a small, heart-shaped cake topper or a pair of edible figurines.
5. Serving Suggestions for Valentine’s Day
A Valentine’s heart cake is more than a dessert—it’s a celebration centerpiece.
- Pair with Drinks: Serve the cake with champagne, sparkling cider, or a creamy latte for a perfect pairing.
- Use Festive Tableware: Present the cake on a decorative cake stand or platter with Valentine’s-themed plates and napkins.
- Add Complementary Treats: Arrange small treats like chocolate-dipped strawberries, macarons, or heart-shaped cookies around the cake for a dessert spread.
Pro Tip: Slice the cake carefully using a hot, clean knife to maintain the shape and neatness of each piece.
6. Memories and Moments
Baking and decorating a Valentine’s Day heart cake can be a fun and memorable activity to share with loved ones.
- Bake Together: Involve your partner, kids, or friends in the baking process for a shared experience.
- Capture the Moment: Take photos of the finished cake and the baking process to commemorate the occasion.
- Share the Love: Package slices of the cake as thoughtful gifts for friends or neighbors, spreading Valentine’s Day cheer.
Pro Tip: Add a personal touch by wrapping cake slices in parchment paper and tying them with a red or pink ribbon.
A Valentine’s Day heart cake is more than just a dessert—it’s an expression of love, creativity, and joy. Whether you keep it simple or go all out with decorations, this cake is sure to warm hearts and create lasting memories.
Anniversary and Wedding Heart Cakes
Heart-shaped cakes are a timeless choice for celebrating anniversaries and weddings. They are a symbol of love and devotion, making them the perfect centerpiece for such significant occasions. Whether you’re planning an intimate celebration or a grand event, a heart cake can be designed to suit the theme and mood of the day. Here’s how you can make an anniversary or wedding heart cake truly special.
1. Designing a Heart Cake for Anniversaries
Anniversary cakes often reflect the couple’s journey together and their shared memories. A heart-shaped design adds a romantic flair.
- Milestone Years: Highlight the anniversary year by incorporating numbers made of fondant or edible gold. For instance, “25” for a silver anniversary or “50” for a golden one.
- Color Themes: Use colors associated with the anniversary milestone—silver, gold, ruby, or sapphire—to decorate the cake.
- Personalized Elements: Include edible photo prints, initials of the couple, or a design that reflects their shared hobbies or interests.
- Elegant Floral Accents: Decorate the cake with fresh or sugar-crafted roses, orchids, or hydrangeas for a sophisticated touch.
Pro Tip: Consider a two-tiered heart cake to accommodate larger gatherings or to make a bold visual statement.
2. Wedding Heart Cakes: A Romantic Statement
For weddings, a heart-shaped cake is a beautiful way to represent the union of two hearts. Here are some ideas for making it extra memorable:
- Classic White Elegance: Stick with an all-white design featuring intricate piping, lace patterns, and sugar flowers for a timeless look.
- Layered and Tiered Designs: Create a multi-tiered heart cake with alternating layers of different flavors, such as vanilla, chocolate, and red velvet.
- Color Coordination: Match the cake’s design with the wedding’s color palette. Subtle ombre shades or bold pops of color can create a stunning effect.
- Topper Options: Add a romantic cake topper, such as a pair of doves, intertwined hearts, or a figurine of the couple.
Pro Tip: Use metallic accents, like gold leaf or silver pearls, to give the cake a luxurious feel.
3. Flavor Ideas for a Heart Cake Celebration
Choosing the right flavors is essential for ensuring your cake is as delicious as it is beautiful. Consider these options for anniversaries and weddings:
- Red Velvet with Cream Cheese Frosting: A romantic and classic choice with its deep red hue.
- Vanilla Bean and Raspberry: A light and fruity option perfect for spring and summer weddings.
- Dark Chocolate and Salted Caramel: A rich and decadent flavor combination ideal for winter celebrations.
- Champagne Cake: A unique and celebratory flavor infused with champagne for a sophisticated twist.
Pro Tip: Offer multiple tiers with different flavors to cater to varied tastes among guests.
4. Decorating Tips for Special Occasions
Make your anniversary or wedding heart cake stand out with these decoration ideas:
- Edible Lace: Add delicate edible lace along the edges of the heart for a vintage-inspired look.
- Sugar Flowers: Use handcrafted sugar flowers to mirror the floral arrangements of the event.
- Pearl Details: Include edible pearls or beads for a refined and elegant finish.
- Monograms and Calligraphy: Personalize the cake with the couple’s initials or a romantic phrase like “Forever in Love” or “Happily Ever After.”
Pro Tip: Use a smooth fondant finish for a polished and professional appearance.
5. Serving the Cake
A heart cake can also be an interactive part of the celebration.
- Cutting Ceremony: For weddings, the cake-cutting ceremony is a highlight. Choose a special knife set to enhance the moment.
- Serving Sizes: Plan for appropriate serving sizes, ensuring there’s enough for all the guests while keeping the heart shape intact.
- Pairings: Serve the cake with complementary drinks, like champagne, sparkling cider, or a custom cocktail that matches the theme.
Pro Tip: Consider pairing the cake with mini heart-shaped cupcakes or cookies as party favors.
6. Adding Personal Touches
Make the cake unforgettable with custom details:
- Love Notes: Include romantic quotes, vows, or messages on the cake or its base.
- Hidden Surprises: Incorporate a hidden layer or filling, such as a heart-shaped strawberry center or a burst of colored candies.
- Couple’s Story: Reflect the couple’s journey in the design by incorporating elements like their wedding colors, symbols from their travels, or even edible replicas of their favorite flowers.
Pro Tip: For a surprise element, create a cascading effect of flowers or chocolates that reveals itself as the cake is sliced.
A heart cake is a beautiful way to celebrate anniversaries and weddings, combining romance, creativity, and delicious flavors. With thoughtful design and a personal touch, it’s sure to leave a lasting impression on everyone present.
Birthday Heart Cake
A heart-shaped cake is a perfect way to add a touch of love and uniqueness to a birthday celebration. Whether it’s for a child, partner, parent, or best friend, a heart cake can be customized to reflect the personality and preferences of the birthday honoree. Here’s how to create a birthday heart cake that’s not only visually stunning but also unforgettable in taste.
1. Personalizing the Design
The design of a heart cake can make it extra special. Tailor it to the birthday person’s favorite themes, colors, or hobbies.
- Child-Friendly Designs: Incorporate themes like princesses, superheroes, or cartoon characters by using edible toppers or custom frosting designs.
- Elegant Adult Themes: Opt for a sophisticated design with metallic accents, floral patterns, or ombre shading.
- Minimalist Style: For a modern look, keep the design simple with a monochromatic color palette and minimalistic decorations.
Pro Tip: Add the honoree’s name or age in edible lettering for a personal touch.
2. Flavor Options for Every Taste
A birthday cake should cater to the birthday person’s favorite flavors. Here are some popular choices:
- Classic Vanilla and Buttercream: A timeless option that suits all ages.
- Chocolate Fudge: Perfect for chocolate lovers craving a rich and indulgent treat.
- Strawberries and Cream: A light and fruity choice, ideal for spring or summer birthdays.
- Funfetti: A colorful and festive option that’s always a hit with kids.
Pro Tip: Create a two-layer cake with different flavors in each layer to please a variety of palates.
3. Decorating Ideas to Wow Guests
The decorations are what make a birthday heart cake stand out. Here are some creative ideas:
- Sprinkles and Drip Icing: Add a playful touch with rainbow sprinkles and colorful drip icing cascading down the sides.
- Buttercream Flowers: Pipe elegant buttercream flowers on top for a refined and beautiful finish.
- Edible Glitter and Pearls: Add sparkle with edible glitter or pearls for a glamorous look.
- Seasonal Themes: Match the decorations to the season, such as snowflakes for a winter birthday or tropical flowers for summer.
Pro Tip: Use edible images or photo toppers to personalize the cake with a memorable picture of the birthday honoree.
4. Creative Add-Ons for Extra Fun
Enhance the cake with interactive or surprise elements:
- Candy-Filled Center: Create a hollow center filled with candies or sprinkles that spill out when the cake is cut.
- Cake Toppers: Add themed or customized cake toppers like “Happy Birthday” signs, mini figurines, or age numbers.
- Hidden Messages: Include a sweet message or birthday wish hidden within a layer of the cake.
Pro Tip: Add a small cupcake tower or a set of matching cupcakes around the heart cake for extra servings.
5. How to Serve the Cake
Make the cake-cutting ceremony part of the birthday festivities.
- Display It Beautifully: Use a cake stand or decorated base to make the heart cake the centerpiece of the dessert table.
- Cutting and Serving: Plan for slices that retain the heart shape for maximum visual appeal.
- Pair It with Sides: Offer side treats like ice cream, fresh fruits, or chocolate sauce to complement the cake.
Pro Tip: Serve slices with personalized plates or napkins that reflect the birthday theme.
6. Themed Birthday Heart Cakes
For an extra-special touch, design the cake around a specific theme:
- Romantic Hearts: For a loved one, incorporate roses, heart motifs, and romantic colors like red or pink.
- Sports Lovers: Design the heart cake with edible decorations of their favorite sport or team.
- Hobbies and Interests: Reflect their passions, such as music notes for a musician or paint splashes for an artist.
- Milestone Birthdays: Highlight milestone ages like “Sweet 16,” “30 and Thriving,” or “Fabulous at 50” with bold designs and numbers.
Pro Tip: Use glow-in-the-dark candles or sparklers for a memorable cake-cutting moment.
A heart cake adds charm and thoughtfulness to any birthday celebration. By tailoring the design, flavors, and decorations to the honoree’s preferences, you’ll create a cake that’s both delicious and deeply meaningful. It’s the perfect way to show how much you care while making the day extra sweet.
Tips for Perfect Results Every Time
Common Mistakes to Avoid
Creating a heart cake can be an enjoyable and rewarding process, but even the smallest missteps can affect the final result. Here’s a detailed guide to help you steer clear of common pitfalls, ensuring your cake is as perfect as you envision.
1. Skipping Proper Pan Preparation
One of the most frequent mistakes is not properly preparing your heart-shaped cake pan, which can lead to sticking or uneven baking.
- Mistake: Forgetting to grease or line the pan.
- Solution: Always grease the pan with butter or cooking spray and line the bottom with parchment paper. This ensures easy release and prevents your cake from breaking apart.
- Extra Tip: Use a pastry brush to get into the sharp corners and edges of the heart-shaped pan.
2. Uneven Cake Batter Distribution
Unevenly distributing the cake batter can result in lopsided layers or uneven cooking.
- Mistake: Pouring batter without smoothing it out.
- Solution: Use a spatula to evenly spread the batter across the pan. Tap the pan gently on the counter to eliminate air bubbles and settle the batter.
- Extra Tip: Rotate the cake halfway through baking to ensure even cooking in the oven.
3. Overmixing or Undermixing Batter
The consistency of the batter can make or break your cake.
- Mistake: Overmixing can lead to a dense, tough cake, while undermixing may leave lumps or uneven texture.
- Solution: Follow the recipe’s instructions for mixing, stopping as soon as the batter is smooth and combined. Use a stand mixer or hand whisk at low speed to avoid overworking the ingredients.
- Extra Tip: Scrape the sides of the mixing bowl to ensure no ingredients are left unmixed.
4. Incorrect Baking Time or Temperature
Baking a heart cake requires attention to time and temperature due to its unique shape.
- Mistake: Using the wrong temperature or baking for too long can result in dry or burnt edges and an undercooked center.
- Solution: Use an oven thermometer to ensure accurate temperature settings, and start checking for doneness five minutes before the recommended time.
- Extra Tip: Test the cake with a toothpick inserted in the thickest part; if it comes out clean, the cake is ready.
5. Neglecting to Level Cake Layers
Skipping the step of leveling cake layers can cause a crooked or unstable final presentation.
- Mistake: Stacking uneven layers without trimming them.
- Solution: Use a serrated knife or a cake leveler to remove the dome from the top of each layer, ensuring they stack neatly.
- Extra Tip: Save the trimmed cake scraps for snacking or making cake pops.
6. Rushing the Cooling Process
Attempting to frost or decorate the cake while it’s still warm is a common error.
- Mistake: Applying frosting too soon can cause it to melt or slide off.
- Solution: Allow the cake to cool completely on a wire rack before frosting. Ideally, chill the layers in the refrigerator for 30 minutes to make them firmer and easier to work with.
- Extra Tip: If you’re in a hurry, place the cake in the freezer for 10-15 minutes for a quick cool-down.
7. Using the Wrong Frosting Consistency
The wrong frosting texture can lead to a messy appearance or difficulty in decorating.
- Mistake: Frosting that’s too stiff will tear the cake, while frosting that’s too thin won’t hold its shape.
- Solution: Ensure the frosting is spreadable but firm enough to hold peaks. Adjust the consistency by adding powdered sugar to thicken or a small amount of milk to thin it.
- Extra Tip: Whip your frosting well for a smooth and fluffy texture.
8. Overloading Decorations
While decorations add personality, too many can overwhelm the design or make the cake unstable.
- Mistake: Adding excessive toppings or heavy decorations that can weigh down the cake.
- Solution: Opt for a balanced approach with a few standout elements, like edible flowers, fondant accents, or a piped border.
- Extra Tip: Plan your design ahead of time and practice piping or arranging decorations on a flat surface before applying them to the cake.
9. Failing to Account for Storage
Improper storage can affect the freshness and flavor of your cake.
- Mistake: Leaving the cake uncovered, which can lead to drying out.
- Solution: Store the cake in an airtight container or cover it with plastic wrap to keep it moist. If you’re using perishable ingredients like cream cheese frosting, refrigerate the cake.
- Extra Tip: Bring refrigerated cakes to room temperature before serving for the best texture and flavor.
10. Ignoring Practice Runs for Special Occasions
Attempting a heart cake for the first time on an important occasion can be risky.
- Mistake: Not practicing the recipe or techniques beforehand.
- Solution: Do a trial run a week or two before the event to perfect your methods and make any necessary adjustments.
- Extra Tip: Take notes on timing, ingredient measurements, and challenges during your practice session to ensure a smooth process on the big day.
By avoiding these common mistakes, you can create a heart cake that’s beautiful, delicious, and ready to impress at any celebration. With proper preparation and attention to detail, your cake will look and taste like it was made by a professional.
How to Fix Frosting Mistakes
Even the most experienced bakers can encounter frosting mishaps. Whether it’s uneven application, cracks, or unexpected smudges, frosting mistakes can be frustrating—but they’re almost always fixable! Here’s a detailed guide on how to troubleshoot and repair common frosting issues to achieve a flawless finish for your heart cake.
1. Smoothing Out Uneven Frosting
Uneven frosting can make your cake appear sloppy, but a quick fix can restore its professional look.
- Problem: Frosting looks bumpy or uneven.
- Solution:
- Use an offset spatula or bench scraper dipped in warm water. The heat will help smooth out the frosting.
- Work gently, starting at the top and moving to the sides, scraping off excess frosting for a polished surface.
- Extra Tip: A turntable is a helpful tool to ensure even smoothing while rotating the cake effortlessly.
2. Fixing Cracked or Splitting Frosting
Cracks or splits in the frosting can occur due to dryness or improper consistency.
- Problem: Cracks appear on the frosting after application.
- Solution:
- Lightly mist the frosting with a spray bottle filled with water or milk and smooth it out with a spatula.
- If the frosting is too dry, whip in a small amount of milk, cream, or softened butter to adjust the consistency.
- Extra Tip: Keep your frosting covered and avoid exposure to air for too long to prevent drying out.
3. Correcting Air Bubbles
Air bubbles in the frosting can create unsightly holes and disrupt a smooth finish.
- Problem: Tiny air pockets create bubbles in the frosting.
- Solution:
- Gently pop the bubbles with a toothpick or skewer.
- Smooth the frosting again using a spatula. For buttercream, press down on the bubble lightly to flatten it before smoothing.
- Extra Tip: When whipping your frosting, avoid overmixing to prevent excess air from being incorporated.
4. Dealing with Color Streaks
Color streaks can occur when gel food coloring isn’t properly mixed or when frosting is handled too much.
- Problem: Streaks of food coloring appear in the frosting.
- Solution:
- Remove the affected frosting and mix it thoroughly in a separate bowl until the color is consistent.
- Reapply the corrected frosting with a clean spatula.
- Extra Tip: Always add food coloring gradually and mix it well to avoid streaking.
5. Patching Smudges or Fingerprints
Accidentally smudging the frosting while decorating can be disappointing, but it’s easy to fix.
- Problem: Fingerprints, smudges, or dents mar the surface.
- Solution:
- Apply a small amount of fresh frosting over the smudge and blend it in with a spatula or knife.
- For buttercream, chill the cake briefly to firm up the frosting, then smooth out the surface.
- Extra Tip: Handle the cake with clean hands and minimal contact to reduce the risk of smudging.
6. Fixing Piping Errors
Mistakes during piping, like uneven lines or blobs, can detract from your design.
- Problem: Piping decorations appear uneven or messy.
- Solution:
- Scrape off the piping using a toothpick or small spatula and reapply with a steady hand.
- Practice your design on parchment paper before piping directly onto the cake.
- Extra Tip: Use a piping bag with consistent pressure and rotate the cake on a turntable for smoother lines.
7. Repairing Melted or Sliding Frosting
Frosting that melts or slides off can be caused by high temperatures or improper cooling.
- Problem: Frosting starts to melt or slide off the cake.
- Solution:
- Place the cake in the refrigerator immediately to firm up the frosting.
- If the frosting has completely melted, scrape it off, whip it again to restore texture, and reapply.
- Extra Tip: Avoid frosting a cake that’s still warm, as this increases the risk of melting.
8. Covering Up Major Mistakes
Sometimes, mistakes are too noticeable to fix directly, and creative solutions are necessary.
- Problem: A large section of frosting is uneven or damaged.
- Solution:
- Add decorative elements like edible flowers, sprinkles, chocolate shavings, or fondant accents to mask the imperfection.
- Turn smudges into intentional designs, like swirls or patterns, using a textured spatula.
- Extra Tip: Always have a backup plan for decorations to cover up unexpected mishaps.
Pro Tip for Preventing Frosting Mistakes
The best way to avoid frosting mishaps is preparation. Use high-quality ingredients, follow recipes closely, and practice your techniques beforehand. With a little patience and creativity, even the most challenging frosting issues can be resolved, leaving you with a stunning and delicious heart cake.
Storage and Serving Tips
Proper storage and thoughtful serving can elevate your heart cake experience, ensuring it stays fresh and delicious while delighting your guests. Whether you’re preparing the cake ahead of time or saving leftovers, these tips will help you maintain its flavor, texture, and presentation.
1. Storing Your Heart Cake
Keeping your heart cake fresh depends on its ingredients and how long you plan to store it.
- Short-Term Storage (1–2 Days):
- Cover the cake tightly with plastic wrap or place it in an airtight container to prevent it from drying out.
- If your cake is frosted, use a cake dome or a large, lidded container to protect the frosting from smudging.
- Store the cake at room temperature if it doesn’t contain perishable fillings like cream cheese or whipped cream.
- Long-Term Storage (3–5 Days):
- Transfer the cake to the refrigerator, ensuring it’s wrapped well to prevent it from absorbing odors.
- For frosted cakes, refrigerate uncovered for about 30 minutes to allow the frosting to harden slightly, then cover it loosely with plastic wrap or foil.
- Freezing Your Cake:
- If you need to store the cake for more than a few days, freezing is an excellent option.
- Wrap each layer (unfrosted or frosted) tightly in plastic wrap, then in aluminum foil.
- Place the wrapped layers in a freezer-safe bag or container.
- To thaw, move the cake to the refrigerator overnight, then let it sit at room temperature for about an hour before serving.
2. Serving Your Heart Cake
The way you serve your heart cake can enhance its presentation and enjoyment.
- Optimal Serving Temperature:
- Cakes with buttercream frosting are best served at room temperature for a creamy texture. Allow refrigerated cakes to sit out for 30–60 minutes before serving.
- Cakes with ganache or fondant should also be brought to room temperature for optimal flavor.
- Perfect Slices Every Time:
- Use a warm, sharp knife to cut clean slices. Run the knife under hot water and wipe it dry before each cut.
- For a heart-shaped cake, start slicing from the center, working outward to preserve its iconic shape.
- Accompaniments to Enhance Flavor:
- Serve slices with a dollop of whipped cream, a scoop of vanilla ice cream, or fresh berries for added indulgence.
- For a romantic touch, drizzle slices with raspberry coulis or chocolate sauce.
3. Transporting Your Cake
If you’re taking your heart cake to an event or gathering, proper transportation is crucial.
- Sturdy Cake Base:
- Place the cake on a sturdy, flat board or cake stand to keep it stable.
- Ensure the base is slightly larger than the cake for added protection.
- Secure Covering:
- Use a cake carrier or a large box to shield the cake during transport.
- Place non-slip padding under the cake to prevent it from sliding.
- Temperature Considerations:
- If traveling in warm weather, keep the cake cool by placing ice packs around the carrier or transporting it in an air-conditioned vehicle.
4. Leftover Storage Tips
Make the most of your leftovers by storing them properly for maximum freshness.
- Wrap Individual Slices:
- Wrap each slice in plastic wrap or foil to retain moisture and prevent freezer burn.
- For frosted slices, freeze them uncovered for 1–2 hours until the frosting hardens, then wrap them securely.
- Reheat for Freshness:
- For unfrosted cakes, microwave individual slices for 10–15 seconds to restore their soft texture.
- Avoid reheating frosted cakes to prevent the frosting from melting.
Pro Tip for Perfect Presentation
When serving your heart cake, always clean the edges of your serving plate for a polished look. Garnish the plate with edible flowers, powdered sugar, or fruit slices to make the presentation even more inviting.
With these storage and serving tips, you’ll ensure your heart cake remains a show-stopping centerpiece from the moment it’s baked to the last delicious bite!
Conclusion:
Creating a heart cake is more than just baking—it’s about crafting a symbol of love and celebration that leaves a lasting impression. Whether you’re making it for Valentine’s Day, an anniversary, a wedding, or a birthday, the heart-shaped design adds a special touch of thoughtfulness and charm. With the right tools, ingredients, and techniques, you can bring your vision to life and delight your loved ones with a stunning and delicious centerpiece.
From preparing the perfect batter to decorating with intricate details, each step is an opportunity to showcase your creativity and passion. And don’t forget, baking a heart cake isn’t just for seasoned bakers—with simple tools and a little patience, anyone can make a masterpiece.
So, gather your ingredients, preheat your oven, and let your imagination guide you. Whether it’s adorned with buttercream roses, fondant patterns, or a simple sprinkle of powdered sugar, your heart cake is sure to make any occasion unforgettable.