
Introduction
Chicken cobbler is a comforting dish that combines tender chicken, a creamy filling, and a golden, flaky biscuit topping. It’s the ultimate comfort food, perfect for cozy nights or a family dinner. Unlike the classic chicken pot pie, chicken cobbler is simpler to prepare and requires only one pan, making it an easy and delicious choice for busy days.
This dish is versatile enough to be served for any occasion. Whether you’re in the mood for something hearty or preparing a meal for guests, chicken cobbler will leave everyone satisfied. In this post, we’ll show you how to make the best chicken cobbler with an easy recipe and some expert tips. Ready to make a delicious, comforting meal? Let’s get started!
What is Chicken Cobbler?
For a deeper understanding of chicken cobbler and its variations, check out this informative article on Allrecipes: Chicken Cobbler.
A Brief Overview of Chicken Cobbler
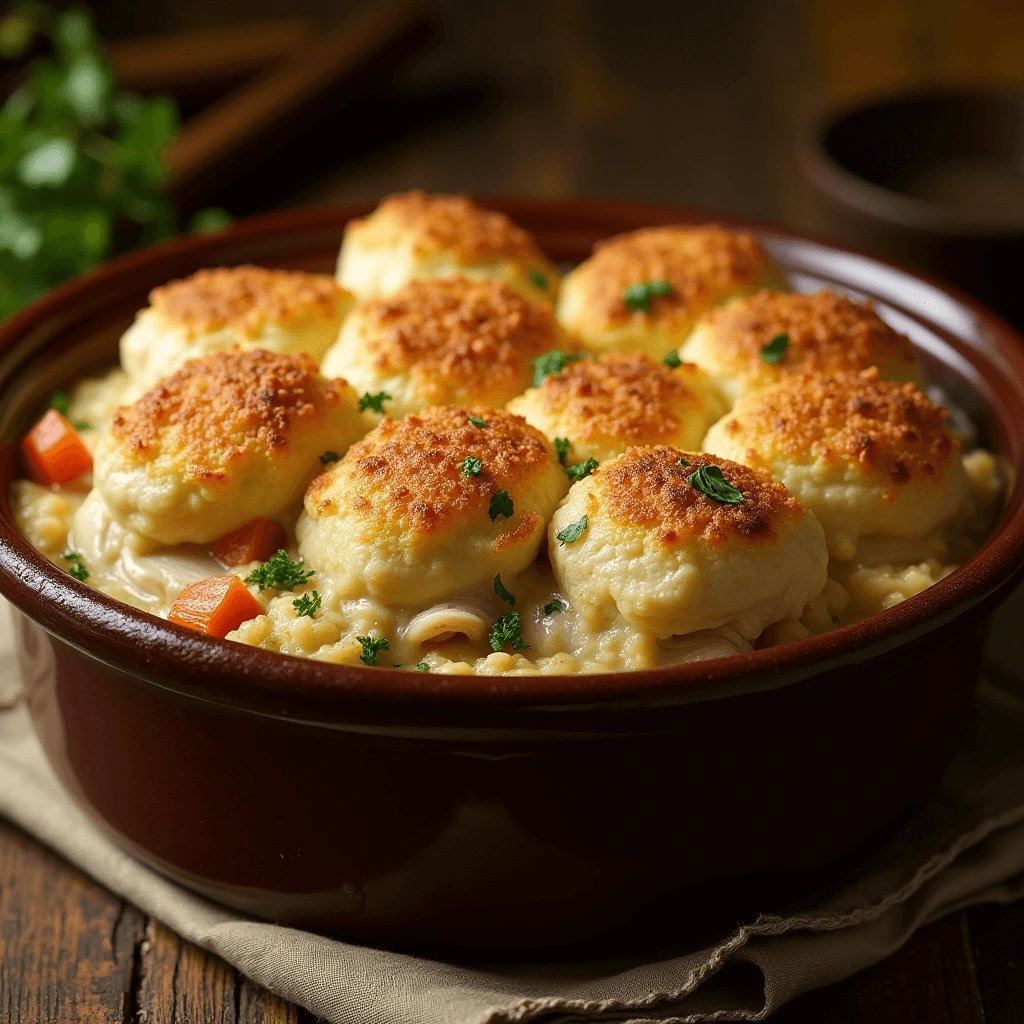
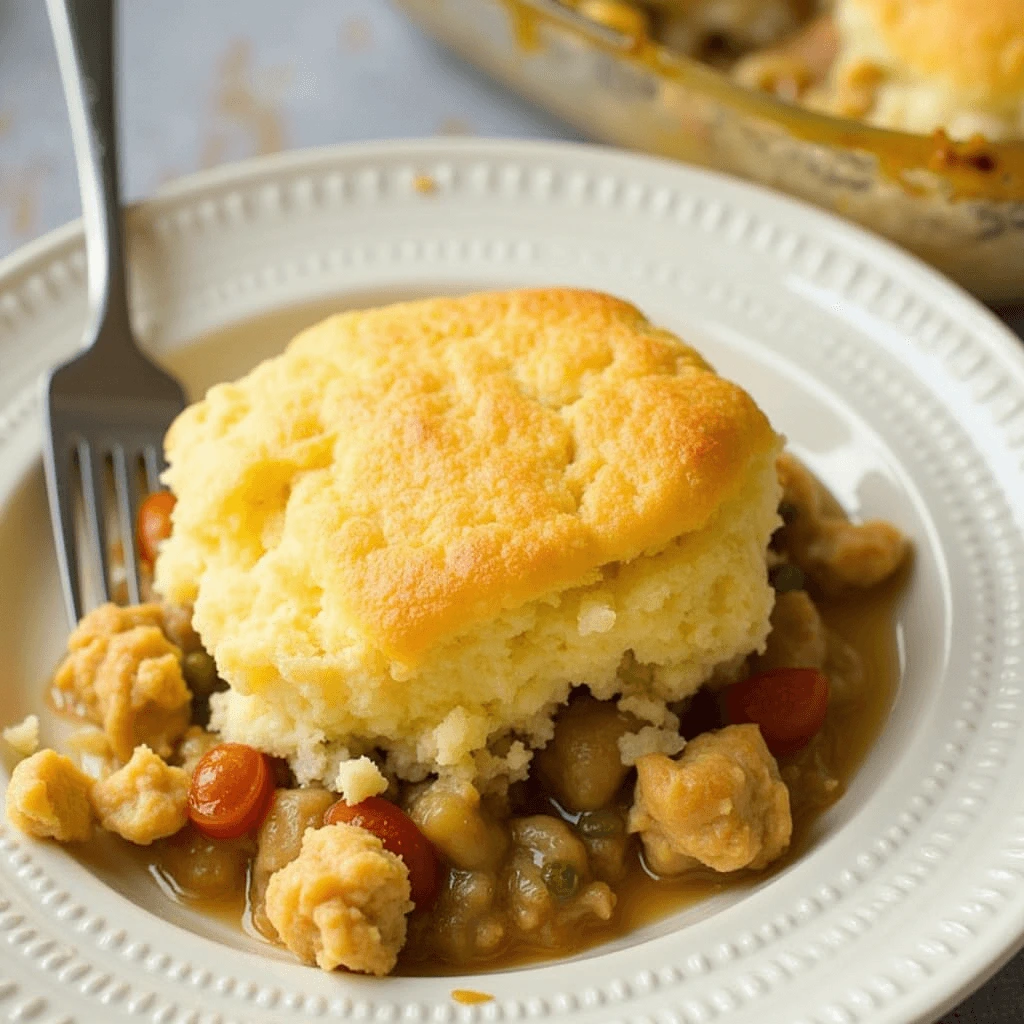
Chicken cobbler is the ultimate comfort food, offering a delicious combination of tender chicken, creamy sauce, and a golden, flaky biscuit topping. It’s easy to prepare and perfect for cozy nights or casual gatherings. While similar to chicken pot pie, chicken cobbler stands out with its biscuit topping, which gives the dish a rustic and hearty feel.
The biscuit topping contrasts beautifully with the creamy filling, creating a satisfying texture. You can add vegetables like carrots, peas, and celery to the filling, making the dish even more flavorful. The seasoning is highly customizable, so you can tailor it to suit your taste preferences.
Originating from Southern cuisine, chicken cobbler was traditionally made with savory ingredients like chicken. It’s simple to make, requiring only a few ingredients that you likely already have in your kitchen. This makes chicken cobbler an ideal meal when you’re craving comfort food without spending a lot of time in the kitchen. Whether you’re a longtime fan or trying it for the first time, chicken cobbler is sure to become a favorite in your recipe collection.
Differences Between Chicken Cobbler and Chicken Pot Pie
Chicken cobbler and chicken pot pie share similar ingredients, but their textures, preparation methods, and overall presentation set them apart. Understanding these differences will help you decide which dish best suits your preferences.
Topping: Biscuit vs. Pie Crust
The biggest difference lies in the topping. Chicken pot pie has a flaky, buttery pie crust that fully covers the filling, creating a crisp, golden shell. In contrast, chicken cobbler uses a soft, biscuit-like topping that is dropped in dollops over the filling, giving it a rustic, textured appearance. The biscuit topping absorbs some of the creamy filling while maintaining its fluffy interior, offering a heartier bite.
Texture and Consistency
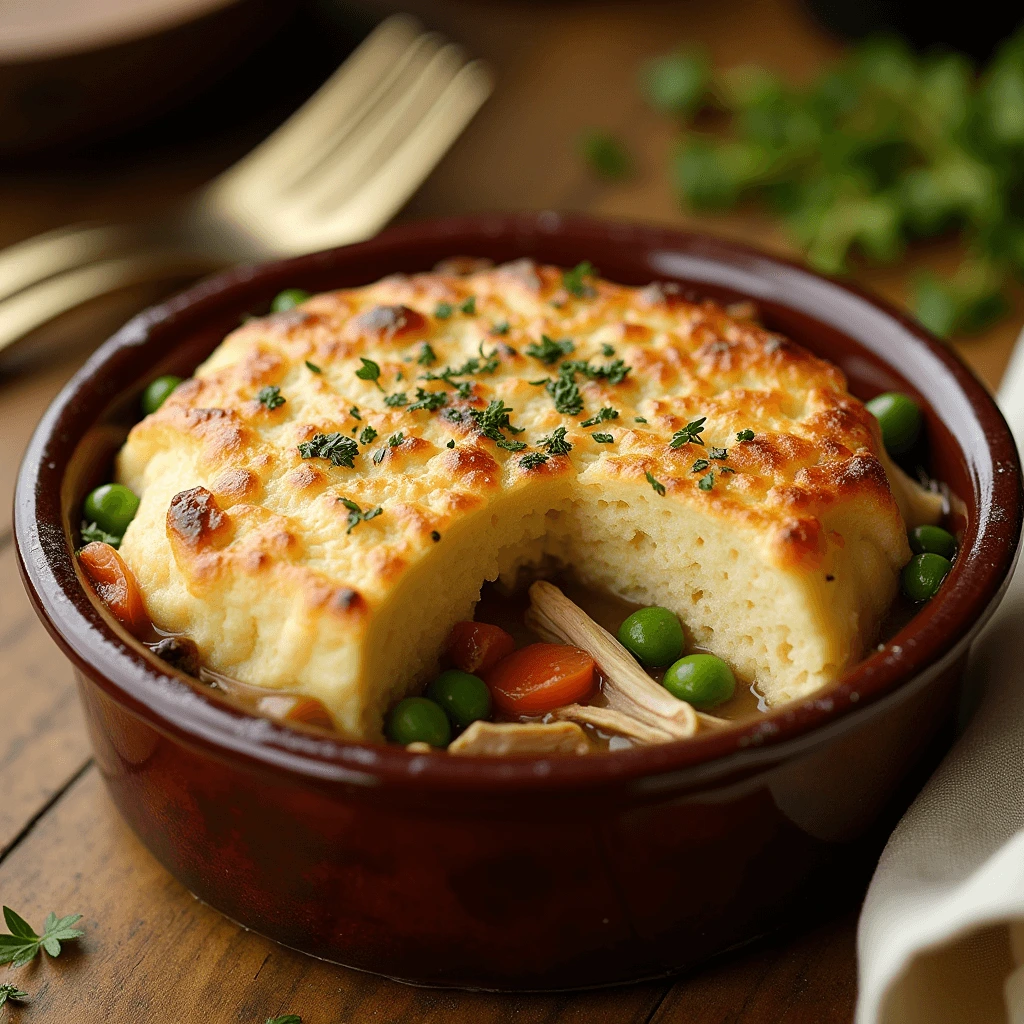
Chicken pot pie has a firm and structured texture, thanks to its enclosed crust. Each slice holds its shape well, making it ideal for individual servings. Chicken cobbler, however, has a more casual, scoopable consistency. The biscuit topping creates a soft, doughy layer on top, while the filling remains slightly looser and more stew-like.
Preparation and Cooking Method
Chicken cobbler is quicker and easier to prepare than chicken pot pie. The biscuit dough requires minimal effort, while a pot pie crust needs rolling, shaping, and sometimes pre-baking. Additionally, chicken cobbler is often made in one pan, reducing cleanup. With chicken pot pie, you may need a separate skillet for cooking the filling before transferring it to a baking dish.
Flavor Experience
Both dishes are rich and savory, but the topping changes the taste. Chicken pot pie’s crust adds a buttery, crisp layer that enhances the overall flavor. Chicken cobbler’s biscuit topping soaks up some of the creamy filling, giving each bite a balance of soft and crispy textures. The biscuit topping also has a slightly bread-like flavor, making the dish feel even more comforting.
Serving Style
Chicken pot pie is traditionally baked in a pie dish or small ramekins, allowing for neat, individual portions. It’s often sliced and served like a traditional pie. Chicken cobbler, on the other hand, is served by scooping portions directly from the baking dish, making it a more rustic, family-style meal.
Which One Should You Choose?
If you prefer a classic, structured dish with a crisp, buttery crust, go for chicken pot pie. If you want a simpler, heartier dish with a fluffy, biscuit topping, chicken cobbler is the way to go. Both deliver rich, comforting flavors, making them excellent choices for a satisfying homemade meal.
Why Chicken Cobbler is a Comfort Food Favorite
Chicken cobbler has earned its place as a beloved comfort food, thanks to its rich flavors, hearty texture, and nostalgic appeal. This dish combines tender chicken, creamy sauce, and a golden, buttery biscuit topping, creating the perfect balance of warmth and satisfaction. Here’s why it continues to be a go-to meal for those seeking cozy, home-cooked goodness.
Warm, Hearty, and Satisfying
The combination of savory chicken and a thick, creamy sauce makes every bite deeply satisfying. Unlike lighter meals, chicken cobbler has a hearty, filling quality that makes it perfect for chilly evenings or when you’re craving something substantial. The biscuit topping adds a soft, fluffy texture that pairs beautifully with the rich filling, making it a dish that feels like a warm hug on a plate.
Nostalgic and Home-Cooked Appeal
For many, chicken cobbler brings back fond memories of family dinners and homemade meals. Its roots in Southern comfort food make it a dish that generations have enjoyed. Whether it’s a childhood favorite or a new tradition in your home, chicken cobbler carries an old-fashioned charm that reminds people of the joy of home cooking.
Simple Ingredients, Big Flavor
One of the reasons chicken cobbler remains a favorite is its use of simple, pantry-friendly ingredients that come together to create something incredibly flavorful. A basic mix of chicken, vegetables, cream-based sauce, and biscuit dough transforms into a rich, indulgent dish. You don’t need fancy ingredients or complicated techniques—just a few essentials to create a meal packed with flavor.
Perfect for Any Occasion
Whether you’re making a quick weeknight dinner, serving guests, or preparing a dish for a family gathering, chicken cobbler fits the occasion. It’s easy to prepare in one dish, making it a stress-free option when you want something delicious without spending hours in the kitchen. Plus, leftovers taste just as good the next day, making it a great make-ahead meal.
A True Comfort Classic
With its creamy, savory filling and tender biscuit topping, chicken cobbler delivers everything people love about comfort food. It’s warm, nostalgic, simple to make, and incredibly satisfying. Whether you’re looking for a cozy meal on a cold night or just want to indulge in something hearty and delicious, chicken cobbler is always a perfect choice.
Essential Ingredients for the Perfect Chicken Cobbler
Key Ingredients for the Chicken Filling
The heart of any great chicken cobbler lies in its rich, flavorful filling. A well-balanced combination of tender chicken, creamy sauce, and hearty vegetables creates the perfect base for this comforting dish. Below are the essential ingredients that give the filling its signature taste and texture.
1. Cooked Chicken – The Star Ingredient
Chicken is the main protein in this dish, providing a hearty, satisfying bite. You can use:
- Rotisserie chicken for a quick and flavorful option.
- Leftover cooked chicken from a previous meal.
- Boiled or roasted chicken breasts or thighs for a homemade touch.
For extra tenderness, opt for chicken thighs, as they contain more natural juices than chicken breasts.
2. Creamy Base – The Secret to Richness
A thick, velvety sauce holds the filling together and adds deep, comforting flavors. The base typically includes:
- Chicken broth or stock for a savory depth of flavor.
- Heavy cream, milk, or half-and-half to create a creamy texture.
- Condensed cream of chicken soup (optional) for an easy, rich shortcut.
For a homemade touch, you can create your own sauce by thickening butter, flour, and broth into a smooth roux before adding milk or cream.
3. Vegetables – Adding Color and Texture
Vegetables enhance the filling with natural sweetness, color, and nutrition. The most commonly used options include:
- Carrots – Adds a touch of sweetness and a vibrant orange hue.
- Celery – Gives the filling a subtle crunch and depth of flavor.
- Peas – Offers a slight sweetness and a pop of green for color contrast.
- Corn (optional) – Adds a slightly sweet flavor and enhances texture.
Fresh, frozen, or canned vegetables all work well in this dish. If using frozen vegetables, thaw them first to prevent excess liquid.
4. Seasonings and Herbs – Elevating the Flavor
Spices and herbs give the filling its signature warm, savory taste. Common seasonings include:
- Salt and black pepper – Essential for balance and depth.
- Garlic and onion powder – Enhances the savory notes.
- Thyme or rosemary – Brings an aromatic, earthy touch.
- Paprika (optional) – Adds subtle warmth and color.
Fresh herbs like parsley or chives can be sprinkled on top for extra freshness.
5. Butter and Flour – The Binding Agents
To achieve the perfect thick, creamy consistency, a butter and flour mixture (roux) is often used. This helps the filling hold together instead of becoming watery. If you prefer a gluten-free option, cornstarch mixed with water can serve as a thickening alternative.
Bringing It All Together
These key ingredients form the perfect balance of creamy, savory, and hearty flavors that make chicken cobbler so irresistible. Whether you prefer classic ingredients or slight variations, using fresh, high-quality components ensures a delicious, comforting meal every time.
The Best Biscuit Topping for Chicken Cobbler
The biscuit topping is what makes chicken cobbler truly special. A good topping should be fluffy, golden, and slightly crisp on the outside, yet soft and buttery on the inside. It soaks up the rich, creamy filling below while maintaining its own distinct texture. Here’s what you need to know about creating the perfect biscuit topping for your chicken cobbler.
1. Choosing the Right Biscuit Dough
The type of biscuit dough you use will greatly impact the final texture of your cobbler. Here are the most common options:
Drop Biscuits (Most Popular)
- These biscuits are made with a simple wet dough that is spooned or “dropped” onto the cobbler before baking.
- They create a rustic, slightly craggy texture that turns golden and crispy on top.
- They soak up just enough of the creamy filling without becoming too dense.
Rolled & Cut Biscuits
- This method uses traditional biscuit dough, which is rolled out and cut into circles or squares.
- It results in a more structured, flakier texture.
- Works best if you like distinct biscuit layers rather than a soft, casserole-style topping.
Store-Bought Biscuit Dough (Quick & Easy)
- If you’re short on time, refrigerated or frozen biscuit dough can be a great shortcut.
- These tend to rise well and create a fluffy, buttery layer with minimal effort.
- To avoid undercooked centers, slice the biscuits in half before placing them on top.
2. Ingredients for a Perfect Homemade Biscuit Topping
If you’re making your biscuit topping from scratch, using the right ingredients ensures the best texture and flavor. Here’s what you’ll need:
Key Ingredients:
- All-purpose flour – The base for structure and fluffiness.
- Baking powder – Helps the biscuits rise and become airy.
- Salt – Enhances flavor and balances the richness.
- Cold butter (or shortening) – Creates flakiness by forming pockets of fat that melt during baking.
- Milk or buttermilk – Keeps the biscuits tender and adds a slight tangy flavor.
- Egg (optional) – Provides structure and richness.
For extra flavor and texture, you can also mix in:
- Shredded cheese (cheddar or parmesan) for a savory, cheesy twist.
- Fresh herbs (thyme, rosemary, or parsley) for added depth.
- A touch of honey for a hint of sweetness.
3. Tips for Achieving the Perfect Biscuit Texture
A few simple tricks can help you get that light, flaky, and golden biscuit topping:
- Use cold butter: Cold fat creates layers in the dough, making the biscuits flakier. For best results, cut the butter into small cubes and keep it in the fridge until needed.
- Don’t overmix the dough: Overworking the dough can lead to tough biscuits. Mix until just combined to keep them light and tender.
- Let the biscuits rest: Allowing the dough to sit for a few minutes before baking helps develop better texture.
- Brush with butter or cream: Before baking, brush the tops with melted butter or heavy cream for a golden, crispy finish.
4. How to Bake for the Best Results
When placing the biscuits on top of the chicken filling, follow these steps to ensure even baking:
- Evenly space the biscuits: Leave small gaps between them to allow steam to escape and prevent sogginess.
- Bake at the right temperature: A 375-400°F (190-200°C) oven ensures the biscuits cook through without over-browning.
- Cover with foil if needed: If the tops brown too quickly before the filling is fully cooked, loosely cover the dish with foil to prevent burning.
Final Thoughts
The biscuit topping is what sets chicken cobbler apart from other comfort dishes. Whether you prefer soft drop biscuits, flaky cut biscuits, or an easy store-bought option, a well-made biscuit layer brings rich, buttery flavor and perfect texture to complement the creamy chicken filling.
Optional Add-ins: Vegetables and Seasonings
One of the best things about chicken cobbler is its versatility. The classic recipe is already rich and comforting, but adding vegetables and seasonings enhances both flavor and nutrition. These optional ingredients let you customize the dish to your taste.
Best Vegetables to Include
Adding vegetables improves flavor and provides essential nutrients. Choose from a variety of options to match your preference.
Classic Vegetables:
- Carrots – Add natural sweetness and a slight crunch. Dice them small for even cooking.
- Celery – Provides a subtle, earthy flavor and enhances the dish’s aroma.
- Onions – Bring depth and richness to the filling.
Hearty and Filling Vegetables:
- Potatoes – Make the dish even more satisfying. Use Yukon gold or red potatoes for a creamy texture.
- Sweet potatoes – Offer a slightly sweet alternative that pairs well with savory flavors.
- Corn – Add subtle sweetness and pops of texture in every bite.
Leafy and Green Vegetables:
- Spinach – Enhances nutrition with mild flavor. Stir it in right before baking.
- Kale – Adds texture and extra vitamins.
- Peas – Provide natural sweetness and a tender bite.
Mushrooms for Umami:
Mushrooms bring a deep, earthy flavor. Sauté them first to maximize taste.
Seasonings to Elevate Flavor
Basic seasoning is key, but adding herbs and spices enhances depth.
Classic Seasonings:
- Garlic powder – Adds warm, savory depth.
- Onion powder – Enhances the natural sweetness of onions.
- Paprika – Gives a mild smoky flavor.
Fresh and Dried Herbs:
- Thyme – A must-have for chicken dishes with an earthy note.
- Rosemary – A bold, fragrant herb.
- Parsley – Adds freshness and color.
Spices for Extra Depth:
- Nutmeg – A tiny pinch enhances creaminess.
- Cayenne pepper – Brings mild heat.
- Smoked paprika – Offers a smoky, slightly sweet taste.
How to Incorporate These Add-ins
Soft vegetables like spinach or kale should be stirred into the filling right before baking.
Firmer vegetables like carrots or potatoes should be diced small and sautéed beforehand to ensure even cooking.
Spices and herbs should be added during cooking so they fully infuse into the sauce.
Final Thoughts
Customizing your chicken cobbler with vegetables and seasonings lets you tailor the dish to your taste while boosting nutrition. Whether you want a heartier version with potatoes and mushrooms, a fresh take with leafy greens, or a bolder flavor with spices and herbs, these additions will make your dish even more delicious.
How to Make the Best Chicken Cobbler: Step-by-Step Instructions
Preparing the Chicken Filling
A great chicken cobbler starts with a rich, well-seasoned filling. The filling should be creamy, flavorful, and packed with tender, juicy chicken. Proper preparation ensures the cobbler is satisfying and balanced in taste and texture. Here’s how to make the perfect chicken filling for your dish.
Choosing the Best Chicken
The type of chicken you use affects the overall flavor and texture. Here are some options to consider:
- Boneless, skinless chicken breasts – Lean and mild in flavor, ideal for a lighter filling.
- Boneless, skinless chicken thighs – More flavorful and tender due to their higher fat content.
- Rotisserie chicken – A time-saving option that adds extra depth from pre-seasoning.
- Leftover roasted chicken – Reduces food waste and enhances the dish with a smoky, roasted taste.
If using raw chicken, cook it until it reaches an internal temperature of 165°F (74°C) to ensure safety and tenderness. Shred or dice it into bite-sized pieces for even distribution in the cobbler.
Building a Flavorful Base
A rich, creamy base holds the filling together and enhances its comforting texture. Here’s what you’ll need:
- Butter – Adds richness and helps create a smooth sauce.
- Flour – Used to make a roux, thickening the filling.
- Chicken broth – Provides deep, savory flavor.
- Milk or heavy cream – Makes the sauce creamy and velvety.
To prepare the base, start by melting butter in a pan over medium heat. Whisk in flour and cook for about one minute to eliminate the raw flour taste. Slowly add chicken broth while stirring continuously to avoid lumps. Once combined, mix in milk or heavy cream and let the sauce thicken.
Adding Vegetables and Seasoning
Vegetables add texture and enhance the filling’s nutritional value. Common options include:
- Carrots – Provide natural sweetness and a slight crunch.
- Celery – Adds an earthy depth to the dish.
- Onions – Bring richness and a subtle sweetness.
- Garlic – Enhances the savory elements of the filling.
For seasoning, use a balanced mix of salt, black pepper, paprika, thyme, and rosemary. These spices elevate the flavor without overpowering the dish. Stir the vegetables and seasonings into the thickened sauce and let them simmer for a few minutes to soften.
Combining the Ingredients
Once the sauce is well-seasoned and vegetables have softened, add the cooked chicken. Stir everything together until the chicken is evenly coated in the creamy mixture. Allow it to simmer for a few minutes so the flavors meld together.
If the filling is too thick, add a small amount of chicken broth to loosen it. If it’s too thin, let it simmer longer to reduce and concentrate the flavors. The goal is a rich, creamy consistency that holds together well when scooped.
Final Thoughts
A well-prepared chicken filling is the heart of a delicious chicken cobbler. By using tender, well-seasoned chicken, a creamy base, and flavorful vegetables, you create a dish that is both satisfying and comforting. Taking the time to prepare the filling correctly ensures your cobbler turns out rich, hearty, and packed with flavor in every bite.
Making the Biscuit Topping
The biscuit topping is what makes chicken cobbler feel indulgent and comforting. It should be golden, fluffy, and slightly crispy on top, providing a perfect contrast to the creamy chicken filling. Making the biscuit topping from scratch is simple, and when done correctly, it elevates the entire dish. Here’s how to create the ideal biscuit topping for your chicken cobbler.
Choosing the Right Ingredients
The key to a perfect biscuit topping is selecting the right ingredients. For the best results, use quality butter, cold dairy, and the right flour. Here’s a breakdown of what you’ll need:
- All-purpose flour – This is the base for your biscuits. It gives the topping structure and tenderness.
- Baking powder – Helps the biscuits rise and become fluffy.
- Salt – Balances the flavors and enhances the taste of the biscuits.
- Cold butter – Cold butter creates flaky layers in the biscuits, providing that irresistible crispiness.
- Milk or buttermilk – Adds moisture and richness to the dough. Buttermilk can add a slight tang, giving your biscuits an extra dimension of flavor.
Making the Biscuit Dough
To make the dough, start by combining dry ingredients. In a bowl, whisk together the flour, baking powder, and salt. This ensures the baking powder is evenly distributed throughout the flour.
Next, cut in the cold butter. Use a pastry cutter or your fingers to rub the butter into the flour mixture until it resembles coarse crumbs with pea-sized pieces of butter. This is crucial for creating those flaky layers. If you don’t have a pastry cutter, two forks work just as well for this step.
Once the butter is incorporated, add your liquid (milk or buttermilk). Pour it in gradually, stirring gently with a spoon until the dough just comes together. Be careful not to overwork the dough—overmixing will result in tough biscuits. The dough should be slightly sticky but manageable. If it’s too dry, add a bit more liquid.
Shaping the Biscuits
Once the dough is ready, it’s time to form the biscuits. You can drop the biscuit dough in spoonfuls on top of the chicken filling, or you can roll it out and cut it into circles. For a rustic look, simply drop spoonfuls of dough over the top of the filling, ensuring it’s evenly distributed across the surface.
If you want a more polished look, lightly flour your work surface, and roll the dough out to about 1-inch thickness. Then, use a round biscuit cutter to cut out the biscuits. This method creates a neat, uniform topping, but both techniques will result in a beautiful cobbler.
Baking the Biscuit Topping
Now, it’s time to bake your chicken cobbler with the biscuit topping. Preheat the oven to 400°F (200°C). When placing the biscuit topping on the chicken filling, make sure the biscuits aren’t touching each other. This allows them to rise properly and become golden brown on all sides.
As the cobbler bakes, the biscuit topping will cook up fluffy and golden, creating a beautiful contrast with the creamy, savory chicken filling. Bake the cobbler for 20-25 minutes or until the biscuits are fully cooked through, and the tops are a rich, golden color. To test if the biscuits are done, gently insert a toothpick into the center of one biscuit. If it comes out clean, the biscuits are ready.
Optional Touches for Extra Flavor
To add extra flavor to the biscuit topping, you can incorporate some additional ingredients:
- Cheese – Grated sharp cheddar or Parmesan can be mixed into the biscuit dough for a cheesy, savory topping.
- Herbs – Fresh herbs like rosemary, thyme, or parsley can add a fragrant touch to the biscuits. Simply chop them finely and mix them into the dough.
- Garlic – Adding a pinch of garlic powder or roasted garlic to the dough can bring out a warm, savory flavor that pairs beautifully with the chicken filling.
Final Thoughts
The biscuit topping is an essential element that completes your chicken cobbler. By using cold butter, proper mixing techniques, and the right ingredients, you’ll create a flaky, golden topping that perfectly complements the creamy filling. Whether you prefer a rustic spoonful topping or a neat biscuit cutout, your chicken cobbler will be a comfort food hit. The key to success is not overworking the dough and allowing the biscuits to bake until they are golden brown and flaky.
Assembling and Baking Your Chicken Cobbler
Assembling and baking your chicken cobbler is the final step that brings everything together. The process requires a bit of care to ensure the biscuit topping bakes to golden perfection while the creamy chicken filling stays moist and flavorful. Here’s a breakdown of the steps for successfully assembling and baking your cobbler.
Layering the Chicken Filling
The first step is to ensure the chicken filling is ready and well-prepared. If you’ve followed the previous steps—making the filling creamy and flavorful with vegetables, seasonings, and tender chicken—it’s time to spread the filling into a baking dish. A medium to large casserole dish works best, as it allows the filling and biscuit topping to bake evenly.
For optimal results, make sure the filling is spread evenly across the bottom of the dish. The consistency should be thick but not overly dry. If the filling is too thick, consider adding a bit more chicken broth or cream to loosen it up slightly. You want the filling to stay creamy during baking without becoming too runny.
Once the filling is evenly spread out, you are ready for the next step.
Adding the Biscuit Topping
Now, it’s time to layer on the biscuit topping. As mentioned in the previous section, you can either spoon the biscuit dough on top of the chicken filling or cut out rounds of dough for a more uniform appearance. Either method will work beautifully, depending on the rustic or polished look you want for your dish.
- Spoon method: If you’re spooning the dough, place dollops of the biscuit mixture over the filling, leaving a bit of space between them. This allows the biscuits to expand as they bake, forming a lovely, irregularly shaped topping.
- Cut-out method: For a more uniform presentation, roll out the dough to about 1 inch thick, and then use a biscuit cutter or a glass to cut out circles. Arrange these circles neatly on top of the chicken mixture, ensuring they are slightly touching. This will help the biscuits rise properly and form a more structured, even layer.
Regardless of the method, try to cover as much of the filling as possible with the biscuit dough to create a cohesive top layer.
Baking Your Chicken Cobbler
Once your cobbler is assembled, it’s time to pop it in the oven. Preheat your oven to 400°F (200°C), and bake the cobbler for 20-30 minutes. The exact time will depend on the size of your baking dish and the thickness of your biscuit topping.
During the baking process, the biscuit topping should rise and turn a beautiful golden brown. The filling will bubble up around the edges, making the dish look deliciously inviting. To ensure the biscuits are fully cooked, check that the tops are golden and crisp. If the biscuits are browning too quickly, you can cover the top of the cobbler with foil for the remaining bake time.
Checking for Doneness
To check if your chicken cobbler is fully baked, gently lift a biscuit from the top and ensure it is cooked all the way through. You should see no raw dough inside, and the biscuit should feel firm yet soft in texture. If the biscuit is slightly undercooked, simply return the cobbler to the oven for an additional 5-10 minutes.
The filling should be bubbling around the edges, and when you insert a fork or spoon into the center, it should come out clean and smooth.
Resting the Cobbler
After the chicken cobbler is finished baking, it’s essential to let it rest for 5-10 minutes before serving. This allows the filling to set slightly, preventing it from running when you cut into the dish. It also gives the biscuits a chance to firm up and hold their shape better.
Optional Garnishes
If you want to add a final touch to your chicken cobbler, you can sprinkle some fresh herbs like parsley, thyme, or rosemary over the top. The bright green color will add a lovely contrast to the golden biscuits, and the fresh herb aroma enhances the comforting vibe of the dish.
Serving Suggestions
Once your cobbler has rested, it’s ready to serve! Scoop out generous portions of the creamy filling topped with a golden biscuit, and enjoy. You can serve it with a side of crisp salad, sautéed greens, or mashed potatoes for a well-rounded meal.
Final Thoughts
Assembling and baking your chicken cobbler is a rewarding process that culminates in a dish that’s both comforting and visually appealing. The creamy, savory chicken filling combined with the flaky, golden biscuit topping creates a satisfying meal that’s perfect for any occasion. By following these steps—layering the filling, adding the topping, and baking to perfection—you’ll end up with a delicious, homemade chicken cobbler that’s sure to please everyone at the table.
Pro Tips for a Flawless Chicken Cobbler
Achieving the Perfect Biscuit Topping Texture
The biscuit topping is one of the most important elements of a chicken cobbler. Achieving the perfect texture—fluffy, tender, and slightly crisp on the edges—requires a few crucial steps. Whether you’re a novice baker or an experienced chef, getting the biscuit topping just right will elevate the entire dish. Here’s a comprehensive guide to achieving that perfect biscuit texture that contrasts beautifully with the creamy filling below.
Use Cold Ingredients
One of the key secrets to achieving a light and flaky biscuit topping is working with cold ingredients. When the butter and liquid are cold, it helps create the flakiness you’re looking for. Cold butter, in particular, is essential. As it melts during baking, it creates pockets of air in the dough, resulting in the desired flaky layers. To achieve this:
- Chill your butter in the fridge for at least 30 minutes before starting. You can even freeze it for a few minutes if you’re short on time.
- Use cold milk or buttermilk to help keep the dough chilled and help it come together without overheating the butter.
Cutting in the Butter Properly
When you cut in the butter (whether using a pastry cutter, fork, or your hands), the goal is to create pea-sized pieces of butter throughout the dough. This step is essential because these small chunks of butter will melt during baking and form the airy, flaky layers. If the butter is overworked, the texture will be dense and crumbly rather than light and fluffy.
Make sure not to overmix the dough. The butter should remain visible in small chunks in the dough. If the dough starts to look too smooth or soft, stop mixing immediately.
Avoid Overmixing the Dough
Overmixing the biscuit dough is one of the most common mistakes that can result in dense biscuits. Overworking the dough develops the gluten, which makes the texture tough instead of light. When mixing the biscuit dough, mix just until the ingredients come together. You want the dough to be slightly lumpy with visible butter pieces.
If you’re using a spoon or your hands to mix the dough, stop mixing once there are no dry spots left, and the dough is cohesive. It’s fine if it’s a little uneven—this is what gives biscuits their flaky texture. The dough should feel slightly sticky but still manageable.
The Right Consistency for Biscuit Dough
Another critical factor is getting the dough’s consistency just right. You want the dough to be moist but not overly wet. Too much liquid will result in a sticky, gooey topping, while too little liquid will make it dry and tough. The dough should feel soft to the touch but should not stick excessively to your hands.
If the dough is too dry, add a tablespoon of milk or buttermilk at a time until it comes together. If it’s too wet, lightly sprinkle some flour and mix it in carefully.
Gentle Handling
When you handle the dough, try to keep the mixing and shaping as gentle as possible. After forming the dough, place it in the baking dish directly on top of the chicken filling without pressing it down too much. Allowing the dough to stay slightly rough will give it a more rustic texture and allow it to rise more during baking, forming more flaky layers.
Proper Biscuit Placement
For biscuits that rise evenly, ensure that the pieces of dough you place over the chicken filling aren’t too crowded. If they’re packed too tightly, the biscuits will bake together, losing their separation and texture. If you’re dropping spoonfuls of dough onto the filling, leave some space between the biscuits to allow them to expand as they bake.
For a more polished look, if you’re cutting biscuits with a biscuit cutter, be sure to leave a little space between the biscuits so they can rise and become golden. This space encourages even cooking and allows the biscuits to develop a beautiful, crispy crust.
Baking Temperature Matters
Baking your chicken cobbler at the right temperature is crucial to achieving the perfect biscuit texture. The oven should be preheated to 400°F (200°C), which is ideal for ensuring the biscuits rise quickly, creating a golden, crisp top without overbaking the filling beneath.
Be sure to bake for the full recommended time (around 20-30 minutes). The biscuits will rise and brown, while the chicken filling will bubble around the edges. The biscuit topping should be firm, golden brown, and slightly crisp on the outside but tender on the inside.
Final Adjustments
If you find that the biscuit topping isn’t quite as golden as you’d like or is slightly underbaked, you can finish it off by covering the cobbler with foil and continuing to bake it for another 5-10 minutes. This ensures the filling stays intact while the biscuit topping gets a final bit of color and crispiness.
Optional Touches for Extra Texture
To give your biscuit topping a little something extra, consider brushing the top with melted butter before baking for a golden, glossy finish. You can also sprinkle a bit of sugar over the biscuit topping to give it a slight sweet crunch that complements the savory chicken filling. Freshly ground black pepper or a sprinkle of herbs like thyme or rosemary can also add more flavor to your topping, enhancing the overall taste and texture.
Final Thoughts
Achieving the perfect biscuit topping texture is a balance of using the right ingredients, mixing carefully, and baking at the right temperature. By using cold butter, handling the dough gently, and ensuring proper baking, you can create a flaky, golden topping that will complement the creamy chicken filling underneath. Whether you prefer a rustic drop biscuit or a more uniform cut-out topping, the result will be a perfectly textured biscuit topping that makes your chicken cobbler a truly special dish.
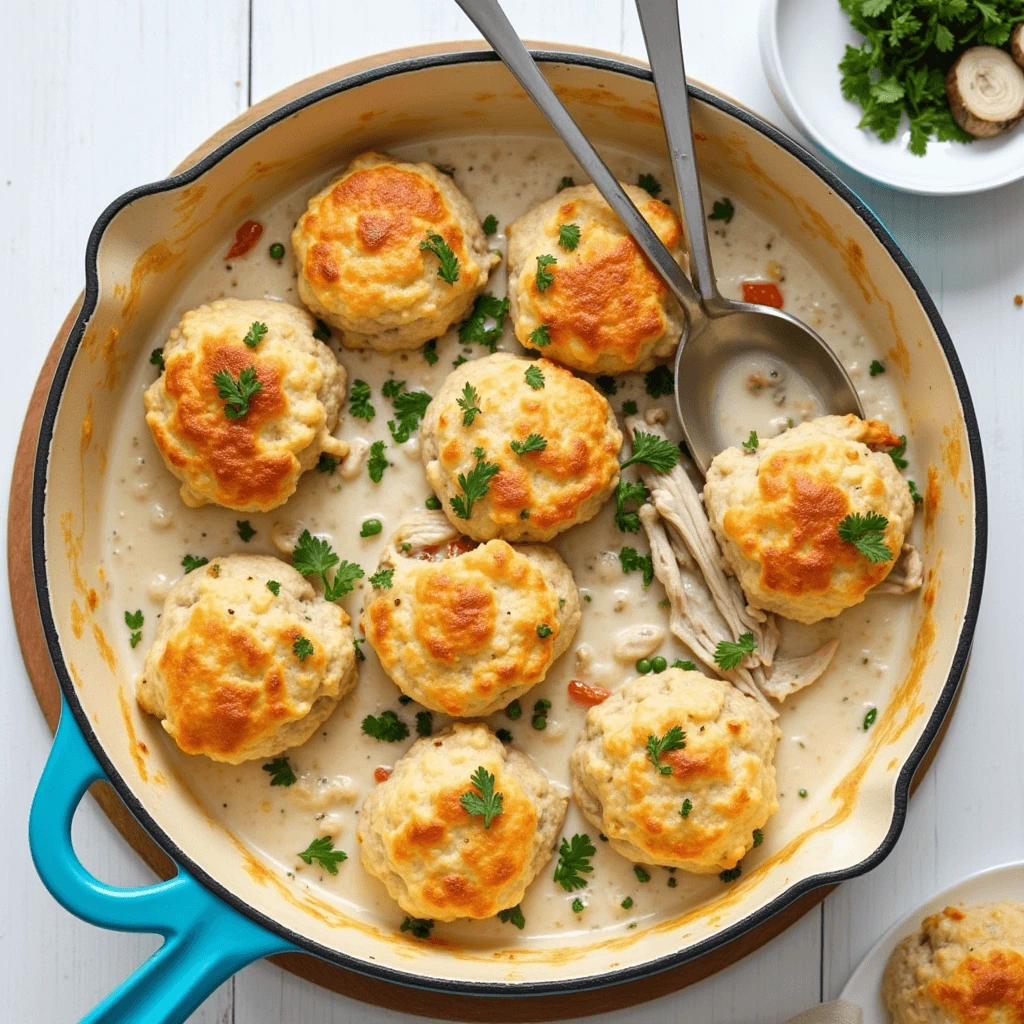
Making It a One-Pan Meal
One of the greatest benefits of preparing chicken cobbler is that it can easily be transformed into a one-pan meal, making cleanup and preparation a breeze. This method allows you to cook and serve your dish in the same pan, saving time, effort, and the need for multiple dishes. Below are some steps and tips for making your chicken cobbler a one-pan meal without sacrificing flavor or presentation.
Choosing the Right Pan
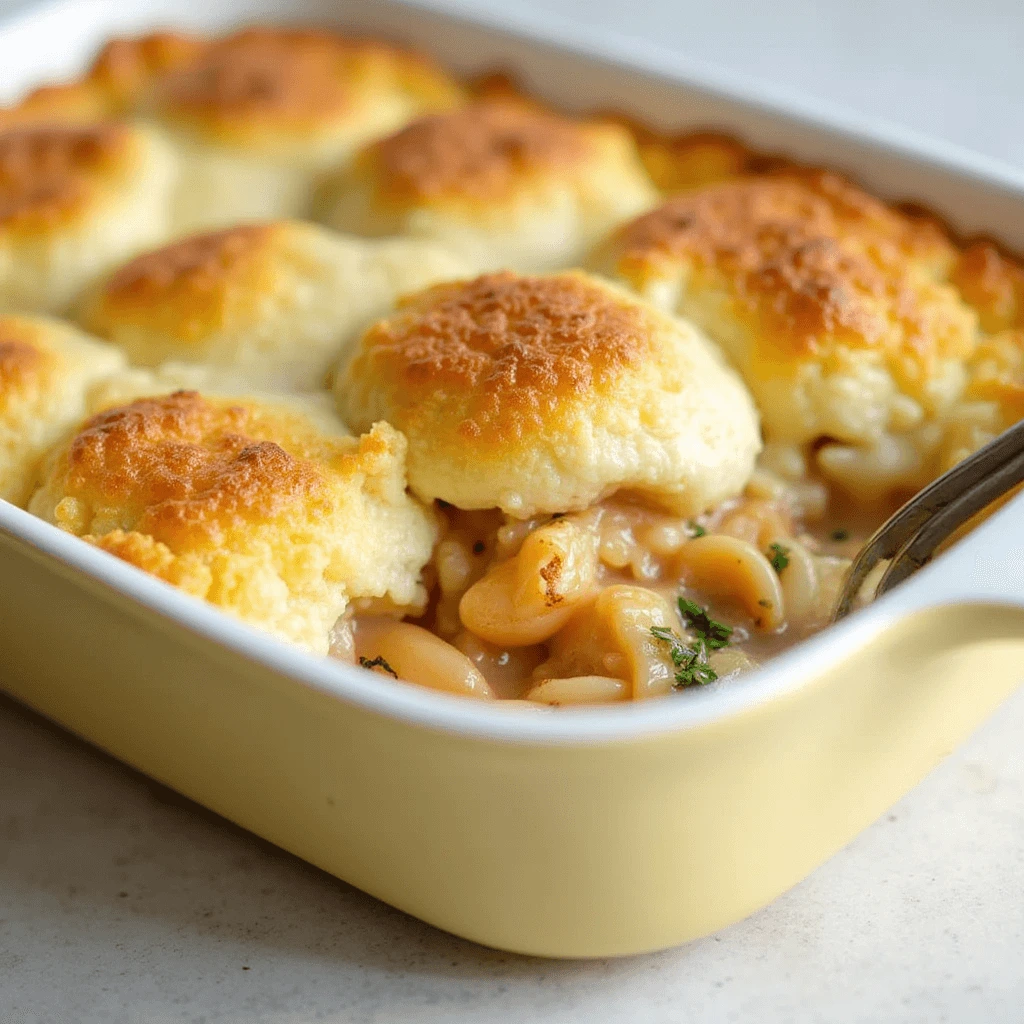
The first step in making your chicken cobbler a one-pan meal is selecting the right baking dish. The pan should be large enough to hold the chicken filling and biscuit topping without spilling over but not so large that the topping becomes too thin. An oval or round casserole dish works perfectly, or you can use a rectangular baking dish, depending on what you have available. The key is to ensure that the dish is oven-safe and has the depth to accommodate both the filling and topping.
A 9×13-inch pan is usually a good size for most cobbler recipes. It allows the filling to be spread evenly and the biscuit topping to rise properly without overcrowding.
Cooking the Chicken Filling in the Same Pan
Instead of cooking your chicken filling in a separate pan, you can easily make the filling directly in your chosen baking dish. Here’s how:
- Sear the Chicken: If you’re using raw chicken breast or thighs, you can quickly sear them in the same baking dish (if it’s stovetop-safe) or a separate skillet. Searing adds flavor and locks in moisture, which is important for keeping the chicken tender. Once the chicken is seared, remove it from the pan and set it aside.
- Saute the Vegetables: Next, use the same pan to sauté your vegetables (such as onions, carrots, peas, and celery) in the leftover chicken drippings. This helps to build layers of flavor, and it also keeps cleanup to a minimum. You can add a bit more oil or butter if needed to sauté the vegetables to tender perfection.
- Add the Broth and Seasonings: After the vegetables are softened, add in your chicken broth, herbs, and seasonings. Stir it all together to combine and bring the mixture to a gentle simmer. This forms the base of the creamy chicken filling.
- Shred the Chicken: While the broth and vegetables are simmering, shred or chop the seared chicken into bite-sized pieces and return it to the pan. Stir everything together and let the filling bubble gently. This step ensures the chicken is evenly coated with the sauce and seasoned well.
By cooking everything in the same pan, you save time and minimize the need for washing extra pans.
Assembling the Biscuit Topping
Once the chicken filling is cooked and ready, it’s time to add the biscuit topping. This step can be done directly on top of the filling, and you don’t need to dirty another dish. Whether you’re spooning dollops of biscuit dough or arranging biscuit rounds on top, this can all happen right inside your main pan.
- Spoon method: If you’re using a spoon to drop the biscuit dough, simply spoon the dough over the chicken filling in the pan, ensuring there’s some space between the scoops for the biscuits to rise.
- Cut-out method: If you prefer to cut biscuit rounds, you can gently place them on top of the chicken mixture, fitting them snugly in the pan.
The beauty of assembling everything in one pan is that there is no need to transfer the chicken mixture to another dish for baking. The filling and the topping bake together seamlessly, resulting in a delicious, well-integrated dish.
Baking in the Same Pan
The next step is to bake your chicken cobbler in the same pan, with both the filling and biscuit topping in place. Make sure your oven is preheated to the correct temperature (typically 400°F or 200°C), and bake the cobbler until the biscuits are golden brown and the filling is bubbling hot.
Since both the filling and topping are in the same pan, the baking process allows the flavors to meld together, and the biscuit topping absorbs some of the savory juices from the chicken filling, making every bite delicious.
Serving and Presentation
When your cobbler is finished baking, you can serve directly from the pan. The beauty of a one-pan meal is that it simplifies serving. Use a spoon to dish out portions of both the filling and biscuit topping, and serve the entire dish straight from the pan to your dinner table. This minimizes both cleanup and serving time.
For a more refined presentation, you can garnish the top with freshly chopped herbs or a sprinkle of Parmesan before serving, but even without the garnish, the rustic look of a one-pan cobbler is comforting and inviting.
Cleanup Made Easy
Since everything was cooked in a single pan, cleanup becomes a much simpler task. All you need to do is wash the one pan used for both cooking the filling and baking the topping. This saves you from dealing with multiple pots, pans, and utensils, making chicken cobbler a great option for anyone who wants a delicious, fuss-free meal.
Final Thoughts
Making chicken cobbler a one-pan meal doesn’t sacrifice flavor or presentation. By cooking the filling in the same pan and baking everything together, you simplify both the cooking process and cleanup. Not only does this method save time, but it also helps the ingredients to meld together, creating a dish that is rich in flavor and texture. Whether you’re cooking for a family or preparing a cozy weeknight meal, a one-pan chicken cobbler is a deliciously convenient option that everyone will love.
Adjusting the Recipe for Different Dietary Preferences
One of the great things about chicken cobbler is its versatility, which makes it easy to adjust to fit various dietary preferences and needs. Whether you’re cooking for someone with a gluten intolerance, following a low-carb diet, or simply looking for a lighter option, there are plenty of ways to modify the ingredients while still keeping the dish flavorful and satisfying. Below are several ways to adjust the recipe to suit different dietary preferences.
1. Gluten-Free Chicken Cobbler
For those following a gluten-free diet, swapping out the standard biscuit topping for a gluten-free alternative is key. There are many pre-made gluten-free biscuit mixes available that are perfect for this recipe, or you can make your own using gluten-free flour blends like rice flour or almond flour. Here are a few options to consider:
- Gluten-Free Biscuits: Use a gluten-free baking mix to create the biscuit topping. Be sure to follow the instructions on the package and adjust any liquid amounts as necessary to get the right biscuit dough consistency.
- Almond Flour Biscuits: If you prefer a more homemade approach, almond flour is a great gluten-free option. This will give the biscuit topping a slightly nutty flavor, adding depth to the dish.
- Coconut Flour: Another gluten-free option is using coconut flour to create the topping. Keep in mind that coconut flour is highly absorbent, so you may need to increase the liquid in the recipe to maintain the right texture.
In addition to the topping, ensure the filling ingredients, such as chicken broth, vegetables, and seasonings, are all free from gluten. Some commercial broths and sauces contain gluten, so always check labels carefully.
2. Low-Carb or Keto-Friendly Chicken Cobbler
For those following a low-carb or keto diet, adjusting the chicken cobbler to meet these requirements involves focusing on low-carb ingredients for both the filling and topping:
- Biscuit Topping Substitutes: Instead of traditional biscuits, you can use a cloud bread or almond flour biscuit recipe. These alternatives are lower in carbs and will still give you a soft, flaky topping. Many low-carb recipes use cheese, eggs, and almond flour to create a biscuit-like consistency that’s both satisfying and keto-friendly.
- Low-Carb Vegetables: Stick to non-starchy vegetables for the filling. You can use cauliflower, zucchini, spinach, or mushrooms instead of higher-carb vegetables like potatoes or peas.
- Chicken and Broth: Choose chicken with skin on for added fat content (important for keto diets). Be sure to use low-carb chicken broth or make your own by simmering chicken bones and vegetables, avoiding added sugars or starches that could increase carb content.
These substitutions will allow you to maintain the essence of chicken cobbler while keeping it low in carbohydrates, ensuring it’s compatible with keto or low-carb eating.
3. Dairy-Free Chicken Cobbler
For those who are dairy-free, making a few simple swaps can ensure the dish remains creamy and satisfying without using any dairy products. Here’s how to modify the recipe:
- Dairy-Free Biscuits: Use non-dairy milk such as almond milk or coconut milk in the biscuit dough instead of regular milk. Similarly, you can use dairy-free butter or even olive oil in place of butter for the biscuit topping.
- Creamy Chicken Filling: Instead of heavy cream or butter for the filling, opt for coconut milk or a dairy-free cream alternative like cashew cream to create a rich, creamy base. Coconut milk will add a slight coconut flavor that pairs beautifully with the savory chicken filling.
- Cheese Substitutes: If your recipe calls for cheese in the biscuit topping or the filling, use a dairy-free cheese alternative. There are many options available in most supermarkets, including nut-based cheeses like cashew cheese or soy-based cheeses that melt well and provide a similar texture and taste.
These adjustments ensure that your chicken cobbler remains rich and flavorful while accommodating a dairy-free diet.
4. Vegetarian or Vegan Chicken Cobbler
If you’re cooking for someone who follows a vegetarian or vegan diet, you can easily adapt the chicken cobbler recipe by substituting the chicken with plant-based proteins and using non-animal products for the filling and topping:
- Vegetarian Protein Options: Instead of chicken, use a plant-based protein like tofu, tempeh, or seitan. These ingredients will mimic the texture of chicken and absorb the flavors of the dish. For a heartier filling, you could also use chickpeas, lentils, or vegetables like mushrooms to bulk up the dish.
- Vegan Biscuit Topping: Use plant-based butter and non-dairy milk to create the biscuit topping. You can easily find vegan biscuit mixes that are ready to go or make your own from scratch using a mix of flour (like whole wheat, almond, or gluten-free flour) and plant-based ingredients.
- Rich and Savory Filling: To add richness and flavor to the filling, use vegetable broth or mushroom broth. Add seasonings like nutritional yeast for a cheesy flavor and tamari or soy sauce to bring umami to the dish.
These changes will ensure that your chicken cobbler is suitable for vegetarians and vegans while maintaining a satisfying and flavorful meal.
5. Lower-Fat Chicken Cobbler
If you’re looking to make a lower-fat version of chicken cobbler, focus on cutting down the fat in the biscuit topping and the filling:
- Low-Fat Biscuit Topping: Replace regular butter with reduced-fat butter or applesauce in the biscuit dough to reduce the fat content. You can also make a lighter biscuit topping by using low-fat milk or non-dairy milk.
- Chicken Choices: Choose leaner cuts of chicken, such as skinless chicken breasts or lean chicken thighs. These cuts are lower in fat and still provide excellent flavor and moisture.
- Lightening the Filling: Use low-fat or fat-free chicken broth and limit the use of cream or other high-fat ingredients. Instead of using a rich cream base, you can use a vegetable puree or non-dairy cream to keep the filling light but still creamy.
By using these lighter alternatives, you can still enjoy a comforting and satisfying chicken cobbler without the added calories or fat.
6. Adjusting for Nut-Free Diets
If you are cooking for someone with a nut allergy, it’s essential to avoid any ingredients that may contain nuts or nut products. For the biscuit topping and the filling:
- Biscuit Topping: If using almond flour for the biscuit topping, substitute it with all-purpose flour (for non-gluten-free diets) or a safe flour blend. If you are using any store-bought mix, be sure to check that it’s free from any nuts or nut-derived ingredients.
- Filling: Ensure that the filling does not contain any nut-based products such as cashew cream or almond milk. Use regular dairy or non-dairy milk and a safe, nut-free broth.
By making these adjustments, you can cater to a nut-free diet while still enjoying all the delicious flavors of chicken cobbler.
Final Thoughts
By adjusting the ingredients and preparation techniques, you can easily modify your chicken cobbler recipe to suit various dietary preferences and needs. Whether you’re cooking for someone who’s gluten-free, following a keto diet, or looking for a vegan or dairy-free version, there’s a way to enjoy this comforting dish without compromising on taste or texture. With these helpful tips, you can make sure everyone at the table can enjoy a warm, hearty meal tailored to their dietary requirements.
Serving and Storing Your Chicken Cobbler
Delicious Side Dishes to Pair with Chicken Cobbler
While chicken cobbler is already a satisfying one-pot dish, adding a side or two can elevate the meal even further, creating a well-rounded dining experience. The richness and heartiness of the chicken cobbler pairs wonderfully with fresh, light, or even hearty sides that balance out the meal. Whether you’re aiming for something fresh, creamy, or savory, here are several delicious side dish ideas that will complement your chicken cobbler perfectly.
1. Fresh Green Salad
A green salad is a classic side that works beautifully with the warm, savory flavors of chicken cobbler. The crunchiness and freshness of the vegetables add a refreshing contrast to the creamy, rich filling. Here are some salad ideas to try:
- Simple Mixed Greens: A combination of arugula, spinach, and lettuce with a light vinaigrette can provide a crisp, tangy contrast to the richness of the cobbler.
- Caesar Salad: If you prefer something heartier, a classic Caesar salad with crunchy croutons and a creamy dressing can pair nicely with the biscuit topping of the cobbler.
- Cucumber and Tomato Salad: For a light, refreshing choice, a cucumber and tomato salad with a lemony dressing can cut through the heaviness of the cobbler.
Adding some fresh herbs like parsley or basil to your salad can enhance the flavor and add a touch of color to your plate.
2. Roasted Vegetables
Roasted vegetables are a great way to add depth and texture to your meal. Their caramelized flavor complements the savory chicken filling, while their tender, slightly crispy texture contrasts with the soft biscuit topping. Here are some vegetable options to roast:
- Carrots and Parsnips: These root vegetables become wonderfully sweet and tender when roasted, and they add a lovely earthy flavor to your meal.
- Brussels Sprouts: Roasting Brussels sprouts gives them a caramelized exterior and soft interior, making them the perfect side to a rich and comforting dish like chicken cobbler.
- Sweet Potatoes: Roasted sweet potatoes add a mild sweetness and a creamy texture that pairs well with the savory flavors of the cobbler. You can add a drizzle of olive oil and a sprinkle of sea salt for extra flavor.
For a balanced meal, try combining different vegetables with varying textures and flavors.
3. Garlic Bread or Crusty Bread
A side of garlic bread or crusty bread is another fantastic pairing with chicken cobbler, especially if you enjoy scooping up any extra sauce or filling. The crunchy, buttery bread contrasts beautifully with the creamy texture of the cobbler filling and is perfect for mopping up any leftover goodness. You can easily make your own garlic bread by:
- Brushing sliced baguette with garlic butter: Toast in the oven until golden brown for a simple yet indulgent side.
- Serving with a rustic, crusty loaf: A whole wheat or sourdough loaf with a hearty crust will bring a chewy, satisfying texture to your meal.
If you’re serving a lighter version of the chicken cobbler, opt for a whole-grain bread to add a bit more fiber to the meal.
4. Mashed Potatoes or Cauliflower Mash
If you’re looking for a comfort food side that is as rich and satisfying as the chicken cobbler, mashed potatoes are a great option. Their smooth, creamy texture can enhance the hearty filling of the cobbler. For a twist on the classic, try:
- Mashed Potatoes: Simple mashed potatoes with butter and cream are a perfect match for the savory cobbler. You can add garlic or herbs for extra flavor.
- Cauliflower Mash: If you’re looking for a lighter or lower-carb option, mashed cauliflower is an excellent substitute. It has a similar creamy texture to mashed potatoes but with fewer calories and carbs.
- Sweet Potato Mash: For a bit of sweetness and color, mashed sweet potatoes with a hint of cinnamon or nutmeg can add complexity to the meal and pair well with the savory flavors of the cobbler.
The mashed potatoes or cauliflower mash serve as a great vehicle for any sauce or gravy from the cobbler and help create a hearty, filling meal.
5. Sautéed Spinach or Kale
For a nutrient-packed side, sautéed spinach or kale brings in earthy flavors and adds a bit of brightness to your meal. These leafy greens are simple to prepare and provide a beautiful contrast in both flavor and color against the richness of the chicken cobbler. Here’s how you can prepare them:
- Sautéed Spinach: Quickly sauté spinach in olive oil with garlic and a pinch of salt for a quick, flavorful side that adds brightness to the meal.
- Garlic Kale: Sauté kale with garlic and a squeeze of lemon juice for a light, savory side. Kale’s slight bitterness balances the creamy richness of the cobbler, making it an excellent choice.
- Wilted Greens: You can also try Swiss chard or collard greens for a slightly different flavor profile. These greens are hearty, and their earthiness complements the flavors of the chicken cobbler.
If you want to make it a bit more indulgent, you can add a splash of cream or top the greens with grated Parmesan cheese.
6. Creamed Corn
For a dish that adds a sweet, comforting touch, creamed corn is an ideal side to pair with chicken cobbler. The creamy, slightly sweet corn contrasts nicely with the savory chicken filling and biscuit topping. It’s easy to make by simply cooking corn kernels with butter, cream, and a bit of flour for thickening. You can add a sprinkle of paprika or cilantro for extra flavor.
If you’re aiming for a lighter version, you can make lighter creamed corn using low-fat milk or coconut milk for a dairy-free option. The sweet and savory combo works wonderfully with the other components of the chicken cobbler.
7. Coleslaw
Coleslaw is another fresh and tangy side dish that pairs well with the rich flavors of chicken cobbler. The crunchiness of the cabbage and the tangy dressing provide a perfect contrast to the creaminess of the cobbler. You can make a traditional slaw with cabbage and carrots or add other ingredients like apples, red onions, or nuts for extra flavor.
- Creamy Coleslaw: Mix cabbage with a creamy dressing made from mayonnaise, vinegar, and a little sugar. This version complements the richness of the chicken filling.
- Vinegar-Based Coleslaw: For a lighter, less creamy option, a vinegar-based slaw with mustard and honey provides a tangy counterpoint to the comfort food qualities of the cobbler.
Final Thoughts on Side Dishes
Pairing your chicken cobbler with the right side dishes can enhance the meal and create a well-rounded dining experience. Whether you go with something light and fresh like a salad or opt for something hearty like mashed potatoes or roasted vegetables, the right sides will complement the flavors and textures of the chicken cobbler beautifully. With these side dish ideas, your meal will be both satisfying and memorable, perfect for any occasion.
How to Store Leftovers for Later Enjoyment
Storing leftover chicken cobbler properly ensures that you can enjoy the dish later without sacrificing its flavor or texture. Whether you have some extra portions of the casserole or have prepared a large batch to save for later, it’s important to store the dish correctly to maintain its deliciousness. Here are some tips on how to store chicken cobbler leftovers for later enjoyment:
1. Allow the Cobbler to Cool
Before storing your leftovers, it’s important to allow the chicken cobbler to cool down to room temperature. Placing hot food directly in the fridge can raise the temperature inside, which could lead to bacterial growth. Ideally, let the cobbler cool for no more than two hours after cooking. If you want to speed up the cooling process, you can spread the leftovers out on a baking sheet to allow heat to dissipate more quickly.
2. Use Airtight Containers
For the best preservation, store your chicken cobbler in airtight containers. These containers help to maintain the moisture and prevent the cobbler from drying out. If you have a large batch, consider dividing it into smaller portions so that you can easily reheat just the amount you need later. Glass containers with tight-fitting lids or plastic food storage containers work well. Avoid using containers that aren’t airtight, as they may let moisture escape and cause the cobbler to become dry or lose flavor.
3. Store in the Refrigerator for Short-Term Storage
If you plan on eating the leftovers within the next few days, storing your chicken cobbler in the refrigerator is the best option. It will stay fresh for about 3 to 4 days. Simply place the sealed airtight container in the fridge once the dish has cooled down, and it will be ready for a quick reheating session when you’re ready to enjoy it.
When reheating, it’s a good idea to cover the dish with foil to help it retain moisture, and bake it in the oven at a low temperature (around 350°F or 175°C) to ensure the biscuit topping remains soft and the filling is thoroughly heated. Alternatively, you can reheat it in the microwave, though the biscuit topping might lose some of its original texture.
4. Freezing for Long-Term Storage
If you have more leftovers than you can eat in a few days, freezing is an excellent way to keep the chicken cobbler fresh for a longer period. To freeze the cobbler:
- Cool Completely: Make sure the cobbler has completely cooled before freezing to avoid condensation that can cause freezer burn.
- Use Freezer-Safe Containers: Transfer the chicken cobbler into freezer-safe containers or heavy-duty freezer bags. For easier portion control, divide the cobbler into individual servings and freeze them separately.
- Wrap in Plastic or Aluminum Foil: For added protection, wrap the cobbler tightly in plastic wrap or aluminum foil before placing it in a freezer-safe container or bag. This will help prevent freezer burn and preserve the flavor.
- Label and Date: Label the container with the date it was frozen, so you can easily keep track of how long it’s been in the freezer. Chicken cobbler can be frozen for up to 2 to 3 months.
When you’re ready to eat the frozen chicken cobbler, thaw it in the refrigerator overnight for the best results. Reheat it in the oven as you would if it were fresh, though it may take a bit longer since it’s been frozen. Make sure it’s heated all the way through to ensure food safety.
5. Reheating Leftovers
When reheating leftover chicken cobbler, the key is to warm it evenly and maintain the texture of the biscuit topping. Here are some tips for reheating:
- Oven Method: Preheat the oven to 350°F (175°C). Cover the dish loosely with foil to prevent the biscuit topping from burning. Bake for 20-30 minutes, or until the filling is hot and bubbly. If you like the biscuit topping to be a little crispier, remove the foil during the last few minutes of baking.
- Microwave Method: If you’re in a rush, you can reheat chicken cobbler in the microwave. Place a portion on a microwave-safe plate and cover it loosely with a paper towel to prevent splattering. Heat on medium power for 2-3 minutes, stirring once or twice. However, be aware that the biscuit topping may not maintain its crispness in the microwave.
By storing leftovers correctly and reheating them properly, you can enjoy the delicious flavors of chicken cobbler for several days or even weeks after you’ve first made it.
6. Preventing the Biscuit Topping from Getting Soggy
One of the challenges of storing chicken cobbler leftovers is that the biscuit topping can sometimes become soggy. To minimize this, consider these tips:
- Store Topping Separately: If possible, store the biscuit topping separately from the filling. When you’re ready to reheat, you can bake the topping separately and add it back to the cobbler just before serving.
- Reheat Without Covering: If you’re reheating the whole dish in the oven, do so without covering the biscuit topping with foil for the last few minutes. This allows the top to crisp up and become golden brown again.
By following these simple steps, you can extend the enjoyment of your chicken cobbler while keeping it fresh and flavorful. Whether you’re planning to store leftovers in the fridge or freeze them for a future meal, proper storage ensures that every bite remains just as delicious as the first.
Reheating Tips to Keep Your Chicken Cobbler Fresh
Reheating leftover chicken cobbler properly is essential to preserving its flavor, texture, and overall quality. The goal is to ensure that the biscuit topping stays crispy, the filling remains moist, and the dish is heated evenly throughout. Here are some expert tips for reheating chicken cobbler to maintain its freshness and deliciousness:
1. Oven Reheating: The Best Method for Preserving Texture
The oven is the best way to reheat chicken cobbler, as it helps maintain the integrity of the biscuit topping and evenly heats the filling. Here’s how to reheat your cobbler in the oven:
- Preheat the Oven: Set your oven to 350°F (175°C) to ensure that the cobbler reheats at the right temperature. An oven that’s too hot might burn the biscuit topping before the filling is fully warmed through.
- Cover Loosely with Foil: To keep the biscuit topping from becoming too dry or burnt, cover the cobbler with a loose sheet of aluminum foil. This traps moisture in and ensures that the dish heats evenly.
- Bake: Place the covered cobbler in the oven and bake for 20-30 minutes, depending on the size of the dish and how much cobbler you are reheating. Check the internal temperature with a food thermometer—it should reach 165°F (74°C) to ensure food safety.
- Crisp the Biscuit Topping: After the filling is heated through, remove the foil for the last 5-10 minutes of baking. This allows the biscuit topping to become golden brown and crispy again. You can also place the cobbler under the broiler for 1-2 minutes if you prefer an extra crispy finish.
2. Microwave Reheating: Quick and Convenient
While the microwave is a faster option, it can cause the biscuit topping to become soggy or lose its texture. However, with the right technique, you can still achieve satisfactory results. Here’s how to reheat chicken cobbler in the microwave:
- Use Microwave-Safe Containers: Transfer a portion of the cobbler to a microwave-safe plate or bowl. Make sure the portion is evenly spread out for uniform heating.
- Cover with a Damp Paper Towel: To prevent the filling from drying out, cover the dish with a damp paper towel. This will help trap steam and keep the moisture in the filling.
- Reheat in Intervals: Heat on medium power for 1-2 minutes at a time, stirring or checking the temperature between intervals. This will help the cobbler reheat more evenly, as microwaves can often heat unevenly.
- Check the Temperature: Ensure that the internal temperature reaches 165°F (74°C) for food safety. You can use a thermometer to check the filling’s temperature.
Keep in mind that the biscuit topping will likely not be as crispy when reheated in the microwave, but the filling should still be flavorful and enjoyable.
3. Reheating Frozen Chicken Cobbler
If you’ve frozen your chicken cobbler for later, reheating it is a bit more involved but totally worth it. Follow these steps for reheating frozen chicken cobbler:
- Thaw Before Reheating (if possible): If you’ve frozen the cobbler, it’s best to thaw it overnight in the refrigerator. This helps the cobbler heat more evenly and prevents the filling from being cold in the center while the outside becomes overcooked. If you’re in a rush, you can reheat it from frozen, but it will take longer.
- Reheat in the Oven: Preheat the oven to 350°F (175°C). For frozen cobbler, bake it covered for about 45-60 minutes, depending on the size. You’ll want to make sure the filling is fully heated through and that the internal temperature reaches 165°F (74°C).
- Check for Crispness: As with refrigerated cobbler, uncover the cobbler during the last 10-15 minutes of reheating to allow the biscuit topping to become golden and crispy.
4. Use a Slow Cooker for Gentle Reheating
If you have a lot of leftover chicken cobbler and want to reheat it slowly without drying it out, the slow cooker (or crockpot) can be an excellent option. This method is perfect if you have several hours to spare and prefer not to use the oven or microwave.
- Set Slow Cooker to Low: Place the leftover cobbler in the slow cooker, covering it with the lid. Set the slow cooker to the “low” setting to gently warm the dish.
- Check Periodically: Check the cobbler every 30 minutes to ensure it’s warming evenly. Stir the filling if necessary to prevent it from sticking to the sides or burning.
- Reheat Until Warm: The slow cooker may take 1-2 hours to reheat the cobbler completely. The biscuit topping won’t become crispy using this method, but the filling will stay moist and flavorful.
5. Tips for Avoiding Soggy Biscuit Topping
A common challenge when reheating chicken cobbler is keeping the biscuit topping from becoming soggy. To help prevent this, consider the following:
- Reheat with the Topping Off: If you’ve stored the biscuit topping separately, you can reheat it on its own by placing it on a baking sheet in the oven. Bake it at 350°F (175°C) for about 10 minutes to make it crispy, then place it on top of the warmed filling.
- Avoid Overheating the Filling: The longer the filling stays in the oven or microwave, the more moisture is released, which can make the topping soggy. Be sure to heat the filling just until it’s piping hot, and avoid overheating.
6. How to Maintain the Flavor During Reheating
To preserve the fresh flavors of your chicken cobbler, consider these tips:
- Add Fresh Herbs: When reheating the cobbler, sprinkle fresh herbs like parsley, thyme, or rosemary on top to revitalize the flavor.
- Boost the Filling Flavor: If the filling has lost a little flavor after storing, add a splash of broth or cream when reheating to make the filling more flavorful and moist.
- Top with Extra Biscuit Crumbs: If the biscuit topping has softened, you can top it with a few more biscuit crumbs or even a sprinkle of cheese before reheating to add extra texture and flavor.
By following these tips, you can enjoy the taste and texture of your chicken cobbler just as much as when it was freshly made. Whether you reheat it in the oven, microwave, or slow cooker, these methods ensure that your cobbler stays flavorful and satisfying.
Conclusion: Why Chicken Cobbler is a Must-Try Comfort Food
Chicken cobbler is the perfect blend of savory, comforting, and delicious, making it a go-to dish for busy weeknights or weekend gatherings. Its versatility—from the flavorful filling to the golden biscuit topping—allows you to tailor it to your tastes while still providing a hearty meal that everyone will love. Whether you’re enjoying it fresh out of the oven or reheating leftovers, chicken cobbler remains a satisfying option for any occasion. With the right ingredients, preparation techniques, and a bit of creativity, you can make this dish your own. So, gather your ingredients, follow the easy steps, and prepare to enjoy the warm, comforting flavors of homemade chicken cobbler!